Whether you’re a seasoned pro or just starting out in the thrilling world of snowboarding, maintaining your gear for top-notch performance is of paramount importance. In “How Do You Wax A Snowboard At Home?” you’ll find a step by step tutorial that catapults you into the crux of snowboard upkeep. Slathered in straightforward language with images for clarity, the piece demystifies the task of keeping your snowy ride in mint condition, empowering you to wax your snowboard from the comfort of your home.
Understanding the Importance of Waxing a Snowboard
Snowboarding is a fabulous sport that offers you a unique blend of thrill and serenity. To maximize your experience on the slopes, it’s important to maintain your gear properly. One of the key maintenance tasks is waxing your snowboard.
Why snowboards need waxing
Think about this – why does a car need a wax job, or why do we wax floors? Simply put, to enhance performance and increase the lifespan. It’s the exact same principle with snowboards. Thrusting yourself down those snowy mountainsides means your snowboard experiences a lot of friction, and wax helps diminish its effects. Wax keeps your board sliding smoothly and fast on the snow, helps you navigate turns with ease, and offers a certain level of protection to the base.
Benefits of waxing your snowboard at home
Waxing your snowboard at home is beneficial, for many reasons. First off, it’s cost-effective–instead of always paying someone else to do it, you can invest in some basic tools and wax, and you’re good to go. Moreover, it gives you a personal connection with your gear and a better understanding of its needs. Plus, it’s a great pre-season ritual that gets you psyched up for the snowboarding season.
Frequency of waxing a snowboard
Now, you might be wondering how often your snowboard needs waxing. Well, there’s no black-and-white answer because it depends on several things. For instance, the conditions you’re boarding in, how often you’re hitting the slopes, and the type of snowboard you’re using. Generally, however, it’s recommended to wax your board every 4-6 days of riding.
Identifying the Correct Wax
Selecting the right wax for your snowboard may seem like a daunting task given the multitude of choices available. However, it’s less complicated than it appears.
Types of snowboard wax
There are basically three kinds of snowboard wax: hydrocarbon, fluorocarbon, and eco-friendly wax. Hydrocarbon wax is the most popular and cost-effective option, offering good durability and performance. Fluorocarbon wax is pricier but provides superior glide in a variety of conditions. Eco-friendly waxes are becoming increasingly prominent as they cause less environmental harm, but they can be more expensive and less durable than other options.
Choosing the right wax for the current temperature
It’s not just the type of wax that’s important, but also its temperature rating. Wax is designed to work best in particular temperature ranges. So, using a cold-temperature wax for warm conditions, or vice versa, may not give your board the optimum glide. Always check the packaging or product details for the recommended temperature range.
Advantages and disadvantages of different types of wax
As you’ve probably guessed by now, each type of wax has its pros and cons. Hydrocarbon wax, for instance, is cost-effective and performs well, but you may need to apply it more often. Fluorocarbon wax affords excellent glide in a variety of conditions, but it’s more expensive. Lastly, eco-friendly wax is gentle on our planet, but lacks the durability of the others.
Preparing for the Waxing Process
Before you get started, you need to prepare your workspace and assemble your waxing gear.
Finding a suitable workspace
You’ll want to find a well-ventilated area where you can comfortably wax your snowboard. The process releases fumes, hence the importance of good ventilation.
Gathering the necessary waxing equipment
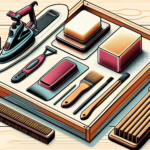
Next, there’s assembling your waxing kit. The basic items you require include: wax (appropriate for the current temperature), an iron or waxing iron, a plastic scraper, and a nylon brush.
Importance of a clean, dry snowboard
It’s vital to start with a clean, dry snowboard. Any dirt or moisture present can negatively affect the wax’s ability to absorb properly into the board, reducing its effectiveness.
Cleaning Your Snowboard Before Waxing
Above we mentioned the importance of a clean snowboard. Now let’s delve into how you actually achieve this.
Why cleaning your snowboard is important
Cleaning your snowboard essentially rids it of dirt, old wax, and other debris that can inhibit fresh wax from adhering to the board. It also gives you an opportunity to examine your board for any damage.
Drying your snowboard after cleaning
After a thorough clean, allow your snowboard to dry completely before starting the waxing process. This ensures there’s no moisture trapped under the newly applied wax.
Safely removing old wax and dirt
Old wax can be effectively and safely removed using a base cleaner or citrus-based cleaner. Apply the cleaner onto a rag and wipe down your board until it’s clean.
Applying the Wax
Now it’s time for the fun part – applying the wax to your snowboard.
How to safely heat the wax
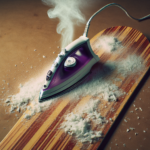
Safety is paramount when heating the wax. Use a waxing iron or a regular one (just make sure you don’t use it for clothes afterwards!). Keep the iron moving to prevent the wax from burning and damaging your board.
Techniques to evenly distribute the wax
Move the iron in a circular pattern to evenly distribute the wax over your board. Pay close attention to the edges, as these areas tend to experience more wear and tear.
Ensuring a complete coating
Ensure a thin, complete coating of wax across the entire base of your snowboard. Overdoing the wax won’t improve performance; it just means more scraping!
Letting the Wax Dry
Once the wax is applied, you need to let it cool and harden.
Optimal drying times
While it might be tempting to hit the slopes right away, patience is key here. Optimal drying time is at least 20 minutes, but leaving it for an hour or even overnight will yield better results.
Effects of not allowing the wax to fully set
Wax that hasn’t had time to set properly may come off on the first run, wasting all your effort.
Transferring the board for drying
Remember to handle your board gently as you move it to a safe place for drying. The wax is prone to smudging when this hot.
Scraping Off the Excess Wax
After the wax has hardened, it’s time for scraping.
Tools required for scraping
A plastic scraper is ideal for this process – it’s effective at removing the excess wax without damaging the board.
The correct method of scraping
You should scrape from tip to tail, maintaining a firm yet gentle pressure. Scraping against the grain can lead to scratches on your board.
Importance of removing excess wax
Excess wax on the surface doesn’t contribute to the glide factor. In fact, it can slow you down, besides causing bumps that make your ride uneven.
Buffing the Snowboard
After scraping off the excess wax, you should buff your snowboard.
Why buffing is important
Buffing helps to even out the leftover wax, creating a smooth surface that enhances glide.
Required tools for buffing
A brush, preferably nylon, is perfect for this job.
Ideal buffing techniques
Brush the snowboard from tip to tail, just like the scraping, to create a nice, smooth finish on your base.
Checking Your Work
You’re almost there. But before you strap on your boots, it’s time to inspect your work.
Identifying an adequately waxed snowboard
A properly waxed snowboard should have a smooth and glossy base. If you notice uneven areas or missed spots, it might be time to do a bit more waxing, scraping, and buffing.
Quick fixes for missed spots or uneven coverage
You can repeat the waxing, scraping, and buffing process on the missed spots or places with uneven coverage.
When to consider a professional waxing
If you’re unsure of your waxing results or if your board has sustained some significant damage, you might want to consider a professional waxing.
Waxing Frequency and Maintenance Suggestions
Now you’ve mastered the art of snowboard waxing, let’s discuss when and why you should re-wax your board.
Determining when your snowboard needs re-waxing
Consistent waxing keeps your snowboard in prime condition. As mentioned earlier, generally, it’s good to re-wax your board after every 4-6 days of snowboarding. However, always visually inspect your board’s base. If it looks dry or you’re feeling slower on the slopes, those signs indicate that your board needs a wax job.
Impact of frequent waxing on snowboard lifespan
Regular waxing doesn’t harm your board; in fact, it extends the board’s lifespan by protecting it from the effects of friction and preventing the base from drying out.
Other snowboard maintenance tips
Beyond waxing, don’t forget to check screws, bindings, and other moving parts regularly. Also, storing your board in a dry, cool place (preferably a snowboard bag) will protect it from damage while it’s not being used.
And there you have it. You’re now a bonafide, snowboard-waxing savant! Remember, waxing isn’t merely a chore, but a ritual that brings you closer to your board and the charming, wintry sport of snowboarding. Happy gliding!
- What Snowboard Bindings Should I Get? - January 23, 2024
- What Size Screws For Snowboard Bindings? - January 23, 2024
- How To Snowmobile On Water? - January 23, 2024

