Imagine taking your snowboarding skills to the next level with your very own box rail right in your backyard? You’re probably thinking it’s quite the challenge, but think again! Here’s your ultimate guide to creating your box rail for snowboarding, tailor-made to your needs and preferences. This article will guide you, step by step, through setting up a durable and safe box rail ensuring both fun and safety are at the heart of your snowboarding experience. So let’s get you excited about making your snowboarding dreams come true.
Understanding the Basics
Snowboarding is not just about cruising down the slopes. It includes a variety of tricks and stunts that are done using special structures like ramps, jumps, half-pipes, and box rails. It’s these features that make snowboarding more thrilling and fun.
What is a Snowboard Box Rail?
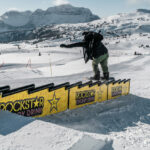
A snowboard box rail, commonly simplified as a “box rail,” is a flat, elongated structure, usually made of metal or wood. It is one of the favorite places where snowboarders like to slide along, perform tricks, and generally test their snowboarding prowess.
Importance of Snowboard Box Rail
The importance of a snowboard box rail in snowboarding can’t be overstated. It’s a staple piece for doing tricks like boardslides, lipslides, and 50-50. Moving on the box rail smoothly and doing flips and spins is not something that can be learned in one day. But with a proper box rail, you can make your snowboarding tricks more enjoyable, and perfect them over time.
Planning your Snowboard Box Rail
The construction of a snowboard box rail requires careful planning. It is not just about the materials and tools; you also need to consider other factors like location, size, and slope.
Choosing the Location
Select a good location where you want to install your snowboard box rail. It should be a spacious and safe area, away from obstacles where you can fall while practicing. You would also want to select a place with a good amount of snow during the winter.
Deciding the Size
The size of your snowboard box rail depends on your skill level. If you are a beginner, you might want to start with a smaller and lower box. As you gain more confidence, you can then switch to a larger and higher box rail.
Considering the Slope
Keep in mind the slope where you’re installing your box rail. A flat slope is easier for beginners, while a slight decline would make the approach and exit of the box rail smooth.
Gathering the Required Materials
There are various materials needed to build a snowboard box rail.
Type of Wood to be used
Treated wood is usually used for the construction of snowboard box rails. It is durable, affordable and resistant to harsh weather conditions.
Necessary Tools
Some of the tools required are a saw for cutting the wood, drill for making holes, screws for securing the frame, and a tape measure for measuring the wood.
Safety Items
Always remember safety first! Use safety glasses, gloves, and a dust mask when cutting and assembling the wood.
Calculating the Dimensions
Length of the Box
The length of your snowboard box rail can vary depending on personal preference. Most box rails are about 10 to 20 feet long.
Width of the Box
Typically, the width of your box rail shouldn’t be too wide or too narrow. Around 18 to 24 inches is a good width.
Height of the Box
The height of your box rail should be low enough for you to easily get on it but high enough to perform tricks. Most box rails are about 1 to 2 feet high.
Getting Started with the Construction
Preparation of the site
Before starting the construction, you need to prepare your location. This might involve clearing snow and other obstacles.
Sourcing Raw Materials
You can easily get the necessary materials such as wood, screws, and tools from a local home improvement store.
Building the Frame
Cutting the Wood
Begin by cutting the wood according to the dimensions you have calculated. Be careful and follow safety measures when using the saw.
Assembling the Base
Once you’ve cut the wood, start assembling the base of your box rail. Use screws to secure the joints and make sure that the structure is sturdy.
Securing the Frame
After the base is complete, secure the frame of the box rail to ensure it’s strong and steady.
Installing the Rail
Choosing the Rail Material
The rail can be a PVC pipe or a round metal rail. PVC pipes are easier to work with and less expensive, while metal rails make for a smoother ride.
Attaching the Rail
Attach the rail on top of the box rail frame, making sure it’s secured tightly with screws.
Securing the Rail
Make sure that the rail is tightly secured to prevent any accidents or instability when snowboarding.
Finishing Touches to the Box Rail
Smoothing the Edges
Smooth the edges of your box rail with a file or sandpaper to avoid sharp surfaces that could harm you.
Adding a Personal Touch
You can customize your box rail by painting it with your favorite color or adding your initials. Just don’t forget to use outdoor-friendly paint to make sure it lasts.
Safety Measures while Building
Proper Use of Tools
Always make sure to use your tools properly. Misuse of tools may lead to accidents and injuries.
Wearing Protective Gear
Wearing a safety helmet, glasses, and gloves can protect you from unforeseen accidents while building and using your box rail.
Maintenance of the Snowboard Box Rail
Regular Checks for Damages
Check your box rail frequently for any damages and fix them promptly.
Fixing Minor Damages
Deal with any small damages like loose screws or splinters as soon as you notice them. It will save you from bigger, more costly problems later.
How to Preserve the Life of Your Box Rail
Taking good care of your box rail ensures it lasts longer. Keep it clean and dry, and store it in a cool, dry place when not in use.
Remember, the journey of building your own snowboard box rail is just as gratifying as mastering a complex trick on it. Take your time, plan carefully, involve some friends if you can, and most importantly, have fun in the process. Happy constructing!
- What Snowboard Bindings Should I Get? - January 23, 2024
- What Size Screws For Snowboard Bindings? - January 23, 2024
- How To Snowmobile On Water? - January 23, 2024

