So, you’ve got a snowmobile and now it’s time to learn a few crucial maintenance skills. That old belt is showing signs of wear and tear, and you’re thinking it’s about time for a replacement. While it may sound daunting, the task of changing your snowmobile’s belt isn’t as hard as you imagine. This article is here to guide you through the step-by-step process to make sure your snowmobile keeps purring along in the snow. It’s time to roll up your sleeves and bring your toolbox because you’re about to become a snowmobile maintenance champ!
Understanding the Importance of Snowmobile Belt
Alright, let’s dive straight into it. You’ve got your snowmobile, and you really want to make sure you keep it running smoothly, right? One crucial component that often gets overlooked is the snowmobile belt – an essential piece of equipment that deserves your regular attention.
The role of the snowmobile belt
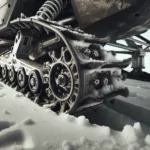
So, what’s the big deal with the snowmobile belt, anyway? Well, this unsung hero transfers the power from your engine to the machine’s track or skis. Essentially, it translates the power into actual movement. Without it, things just aren’t going to get going, no matter how revved up your engine might be.
Signs of a worn out or damaged belt
Recognizing the signs of a worn-out or damaged belt can save you a lot of hassle. Look out for visible wear and tear, cracking, or fraying, and pay attention to unusual vibrations or decreased performance. If your belt is slipping or your snowmobile just can’t reach its usual top speed, this could be a sign that your belt needs to be replaced.
Implications of not changing a worn-out belt
Neglecting to replace a worn-out belt can have some pretty severe consequences. If your belt breaks, you could find yourself stranded mid-ride, which would be more than just mildly inconvenient. Even worse, running your snowmobile with a damaged belt can damage other parts of your machine, leading to costly repairs or a broken down vehicle.
Equipment Needed for Changing the Snowmobile Belt
Before you start, you need to gather the right equipment. Changing a snowmobile belt isn’t a difficult task, but it’s definitely easier if you’ve got the right tools on hand.
Basic tools required
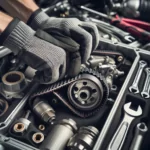
You’ll need a ratchet set, a belt remover and installer, and a torque wrench. Yes, we know it’s tempting to just yank that old belt off, but using the right tools is the safe and responsible choice.
Types of snowmobile belts
There are many types of snowmobile belts, so you need to make sure you pick the right one for your snowmobile. Check your owner’s manual or talk to a professional if you’re unsure.
Safety gear necessary for the task
Remember, safety always comes first. Make sure you’re wearing safety glasses and gloves to protect your eyes and hands.
Locating the Belt on the Snowmobile
Next, you need to find the belt on your snowmobile. If you’re new to this, don’t worry- it’s not as tricky as it sounds.
Distinguishing between the different parts of the snowmobile
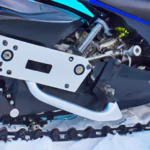
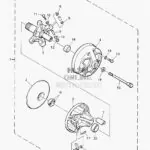
Your snowmobile’s belt is located within the clutch housing, which is generally found towards the front of your snowmobile. It’s sandwiched between the primary (drive) clutch and the secondary (driven) clutch.
Identifying the conditions of the belt
To check the condition of your snowmobile belt, look for any signs of cracking, uneven wear, or chunking. If your belt is in bad shape, it’s time for a new one.
Steps to access the belt
To access the belt, you typically need to remove the clutch housing cover. Make sure the snowmobile is switched off and the key is removed before you start work.
Removing the Old Belt from the Snowmobile
Alright, now it’s time to get your hands dirty. Here’s how you go about removing the old belt from your snowmobile.
Steps to loosen the snowmobile’s clutch
First things first, you need to loosen the snowmobile’s clutch. This is usually done by turning the clutch bolt counter-clockwise. Remember, righty-tighty, lefty-loosey!
Proper technique to slide the belt off
Once you’ve loosened the clutch, slide the belt towards the secondary (driven) clutch and off the primary (drive) clutch. Be gentle here—don’t force anything, as you could potentially damage other parts of your snowmobile.
Handling the old belt
After removing the old belt, inspect it for signs of wear or damage. Cracks, missing sections, or noticeable glazing means it’s time for a replacement.
Cleaning the Clutch Area
With your belt removed, this is an excellent opportunity to give the clutch area a good clean. Trust us, your snowmobile will thank you for it.
Importance of cleaning the clutch
Dust and grime can build up in your clutch area over time. A clean clutch is an efficient clutch—less slippage and wear, and your new belt is going to have a much happier time riding on a clean clutch.
Methods and tools for cleaning
Simple compressed air and a cloth should be sufficient to clean the clutch area. Avoid using chemicals or water, as they could cause damage.
Checking for any damages in the clutch area
Look out for worn sheaves, loose bolts, or any other signs of damage while you’re cleaning. If you notice anything unusual, it may be time for a professional to take a look.
Installing the New Belt
With a clean clutch, you’re ready to install your new belt. Here’s what you need to know.
Choosing the right belt for your snowmobile
Make sure you’ve got the right belt for your snowmobile. Check your owner’s manual to find out which kind you should be using.
Steps to install the belt on the machine
To install the new belt, slide it onto the driven (secondary) clutch first, and then onto the drive (primary) clutch. Make sure it’s seated correctly on both clutches.
Verifying proper belt installation
After installing your new belt, make sure it’s properly aligned with the center of both clutches and that there’s no excess slack.
Adjusting the Belt Deflection
Belt deflection is an important concept to understand. Follow these steps to make sure it’s adjusted correctly.
What is belt deflection?
Belt deflection refers to how much the belt moves vertically when it is pushed down. Too much deflection and the belt will be too loose; too little and the belt will be too tight.
How to correctly adjust belt deflection
The deflection adjustment is typically done using the adjuster bolt on the secondary (driven) clutch. Tighten or loosen the bolt until the belt deflection is within the correct range.
Why proper belt deflection is crucial for performance
Properly adjusted belt deflection will make your snowmobile run more smoothly and efficiently, and can also help prevent premature belt wear.
Testing the New Belt
Once you’ve installed and adjusted your belt, you’re not quite done yet. The final step is to test the new belt to make sure it’s seated and functioning correctly.
Conducting a stationary test
To start, visually inspect the belt while the snowmobile is stationary. Make sure it’s flush with the top of the secondary clutch’s sheaves and that there’s no slippage when you rev the engine.
Listening for unusual sounds
Fire up your snowmobile and listen for any unusual sounds. Unusual noises can indicate that something’s off with the installation, alignment, or tension.
Performing a on-snow test
Finally, take your snowmobile out for a short spin. Make sure it’s accelerating smoothly and reaching its usual top speed. This will ensure that the belt is performing as it should.
Troubleshooting Common Belt Problems
If you do encounter any issues, don’t panic. Here are some common belt problems and their solutions.
Addressing improper belt fit
Is your new belt too loose or too tight? If so, check your deflection adjustment and make sure you’ve got the right belt for your snowmobile.
Dealing with noisy belts
A noisy belt can indicate improper alignment or tension. Make sure the belt is installed correctly and that it’s properly aligned with the center of both clutches.
Fixing issues with belt slipping or overheating
Belt slipping or overheating can be a signal of a worn or damaged clutch. If you’re noticing these issues and your belt is new, it may be time to have your clutch checked out.
Maintenance Tips for the Snowmobile Belt
Want to keep your snowmobile belt in top shape? Follow these maintenance tips.
Regular inspection and replacement
Routinely inspect your belt for signs of wear and replace it as needed. As a general rule, consider replacing it every 1000 miles, but check your owner’s manual for exact specifications.
Proper storage to extend belt life
Store spare belts in a cool, dry place, away from direct sunlight. This will keep your belts in good condition and extend their lifespan.
Avoiding common behaviors that damage the belt
Avoid aggressive, high RPM starts, as this can cause belt wear. Make sure to let your belt cool down after riding, as excessive heat can also lead to wear and tear.
So there you have it – everything you need to know about a snowmobile belt! With regular maintenance and care, your belt will serve you well, and you’ll notice enhanced performance from your snowmobile. Now, time to hit those trails!
- What Snowboard Bindings Should I Get? - January 23, 2024
- What Size Screws For Snowboard Bindings? - January 23, 2024
- How To Snowmobile On Water? - January 23, 2024


