Picture this: you’ve just wrapped up an exhilarating day on the mountain, your snowboard has performed brilliantly but now it’s looking a little worse for wear. But you don’t need to worry. With some simple steps and a bit of elbow grease, you can give your snowboard a detailed clean and have it ready for your next snowy escapade. This article acts as your guidebook, showing you the right way to do just that. Get ready to educate yourself on how to clean your snowboard effectively and efficiently.
Understanding the Importance of a Clean Snowboard
Whether you’re an experienced snowboarder or new to the slopes, maintaining the cleanliness of your snowboard can make a significant difference in overall performance. Dust, grime, and residue can affect your ride just as much as a poor wax job or worn out bindings. Let’s explore the implications of a clean snowboard.
Benefits of Regular Cleaning
Regular cleaning of your snowboard not only helps in maintaining its aesthetic appeal but also supports the board’s performance on the mountains. A clean board slides better, giving you smoother rides and sharper turns. Regular cleaning also allows you to notice any damages or potential problems that may need repairs, ensuring your safety while you enjoy the sport you love.
Impact on Performance
Yes, a cleaner board performs better but have you ever considered why? When a snowboard’s base is dirty, it creates friction with the snow, which slows you down. A clean, well-maintained snowboard reduces this friction, ensuring you glide smoothly over the snow.
Extending the Lifespan of the Snowboard
Cleaning plays a crucial role in increasing the longevity of your snowboard. Dirt and grime, if not cleaned regularly, can damage the base of the board, leading to decreases in performance and eventually shortening its lifespan. Regular maintenance keeps your board in prime condition and ready to hit the slopes season after season.
Preparing for Snowboard Cleaning
Just decided to give your snowboard a thorough clean? Here’s how to prepare for the cleaning process to get the best results.
Gathering Necessary Cleaning Materials
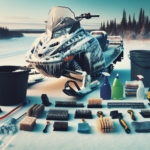
Before you start, make sure you have everything needed for the cleaning process. Typically, you would require a clean cloth, snowboard cleaner (or mild dish soap), a brush, clean water, a sponge, and snowboard wax. Having all the necessary materials ready will make the cleaning process smoother and more efficient.
Choosing an Adequate Cleaning Space
Decide on a spacious, well-ventilated workspace that’s clean and dry. It should have enough room for you to move around the board comfortably. It’s also good to have a place nearby where you can dry your snowboard once it’s been cleaned and rinsed. Also, remember it’s important to clean your snowboard at room temperature to prevent any potential damage due to sudden changes in temperature.
Removing Snowboard Bindings
Before cleaning, you should remove the bindings from your snowboard. This allows for a more thorough clean and prevents any cleaner or water from damaging them. Plus, this is also a great opportunity to inspect and clean your bindings separately.
Initial Wipe Down
Firstly, let’s start with an initial wipe down to get the majority of the surface grime off.
Removing Excess Snow and Ice
Before any cleaning solution comes in contact with your snowboard, you should remove any excess snow or ice. You can use a plastic scraper or a soft bristled brush to gently remove the snow and ice residue.
Using a Soft Clean Cloth
To start the cleaning process, you need to wipe down the entire surface of the snowboard using a soft, clean cloth. This will remove any visible dirt and give you a good starting point for the rest of the cleaning.
Thorough Gentle Wiping
Take time to thoroughly wipe down your board. Be sure to clean all the edges and surfaces, both top and bottom. Remember, this should be a gentle wiping down, not a vigorous scrub.
Applying Snowboard Cleaner
Now, let’s dive into the actual cleaning phase. This involves applying a snowboard-specific cleaner that will help remove grime and residue.
Choosing the Right Snowboard Cleaner
There are several snowboard cleaners on the market. The key is to choose one that’s specific to snowboards, and doesn’t contain harsh chemicals that could potentially harm your board. If you can’t find a snowboard cleaner, a mild dish soap can also do the trick.
Applying the Cleaner on the Surface
Once you have your snowboard cleaner, apply it to the board’s surface using a sponge or cloth. Spread it out evenly, ensuring the entire surface is covered.
How to Avoid Damaging the Snowboard
Avoid letting the cleaner sit on the snowboard for too long, as it can cause damage. You also want to make sure that you don’t scrub too hard or use abrasive materials, which could scratch the surface.
Scrubbing the Snowboard
After applying the cleaner, it’s time for a bit of elbow grease.
Selecting the Correct Brush
To scrub your snowboard, you need a brush. But not just any one – make sure to use a soft brush or a non-abrasive scrub pad to avoid scratching your board’s surface.
Scrubbing Technique for Effective Cleaning
When scrubbing, you want to use circular motions, which helps dislodge any stuck-on grime. Start from one end of the board and work your way to the other, ensuring all areas of the board are well scrubbed.
Areas Requiring Extra Attention
While scrubbing, be mindful of any areas that require extra attention, such as scratches or stains. These areas may need a bit more scrubbing to ensure they are thoroughly cleaned.
Rinsing and Drying the Snowboard
After the scrub, it’s time to rinse and dry. This is just as important as the cleaning itself to avoid water damage and ensure a perfect finish.
Proper Rinsing Technique
When rinsing your board, use warm water and ensure to rinse off all the soap or cleaner. Start from the top and work your way down, making sure nothing is left on the surface.
Importance of Drying
Just like washing, drying is also a pivotal part of cleaning your snowboard. Leftover moisture can lead to rust and other issues. So, make sure your board is completely dry before re-attaching the bindings or storing it away.
Best Drying Methods
For drying, towel dry it first and then leave it out to air dry. Make sure it’s left in a well-ventilated place and it’s not directly exposed to sunlight or heat sources which could warp the board.
Cleaning the Bindings
While your board is drying, let’s clean the bindings.
Wiping Down Bindings
Bindings can be wiped down with a damp cloth to clean off any dirt or grime, taking care not to get them soaking wet.
Checking for Wear and Tear
As bindings are important for security and control during your ride, it’s vital that you check them for wear and tear during the cleaning process. Be sure to check all screws and straps, ensuring there is no significant wear or rust.
Maintaining the Functionality of Bindings
Functionality comes first with bindings. If you find any parts that are worn out and compromising your safety, replace them before your next ride.
Applying Snowboard Wax
After cleaning and drying, your board could benefit from a good layer of wax.
Selecting the Right Wax
There are many types of wax available in the market. Be sure to choose one that’s suitable for your snowboard and the weather conditions you’ll be snowboarding in.
Wax Application Techniques
Applying wax is a straightforward process. You’ll need an iron to melt the wax and apply it to your board. It should be then scraped off after cooling down, leaving a thin, even layer of wax on your board.
Benefits of Waxing After Cleaning
Waxing after cleaning refreshes the base of your board, replenishing any oils lost during the cleaning process. This keeps your board running smooth and fast, and gives your board extra protection from damage.
Buffing and Polishing the Snowboard
The last step is buffing and polishing your snowboard to give it a great finish.
Reasons for Buffing and Polishing
After cleaning, waxing and scraping, your snowboard’s base might still have some small grooves and rough patches. Buffing and polishing will smooth out these minor imperfections and leave the base of your board looking shiny and brand new.
Proper Techniques for Buffing and Polishing
Use a buffing cloth or brush to lightly buff out the base of your board, and then polish it using a polishing cloth.
Final Touches for a Shiny Finish
To finish, give your board a final wipe with a clean, dry cloth, and polish until it gleams. Smoother, shinier boards are quicker boards!
Special Cleaning Tips and Tricks
To wrap up, here are some special tips and tricks to help you keep your snowboard in prime condition.
Caring for Different Snowboard Materials
All boards aren’t the same and different materials require different types of care. Make sure you know the materials used in your snowboard and research the best cleaning methods for each.
DIY Snowboard Solutions
Even if you can’t find particular snowboard cleaning products, you can use mild household cleaners as a substitute. Just be wary and avoid using anything too harsh or abrasive.
Avoiding Common Snowboard Cleaning Errors
The most common cleaning error is not thoroughly drying your snowboard after rinsing. This can cause rusting and damage to your board. Also, avoid using rough or harsh materials on your board to prevent scratching and damage.
And there you go! This guide has covered not only the basics of cleaning your snowboard, but also some advanced techniques and tips. Remember, a clean snowboard is not just about aesthetics; it’s also about performance and longevity. So, roll up your sleeves, give your snowboard a proper clean, and get ready to feel the difference on your next ride down the mountain.
- What Snowboard Bindings Should I Get? - January 23, 2024
- What Size Screws For Snowboard Bindings? - January 23, 2024
- How To Snowmobile On Water? - January 23, 2024

