Sliding down wintery slopes can be a thrilling experience, and one that requires careful preparation, especially when it comes to your gear. This article is specifically about snowboard bindings – your powerful tool that bridges the gap between you and the board. It’s crucial to understand how to properly mount and adjust your bindings to ensure a safe and exhilarating ride. So, if you’re looking forward to an incredible snowboarding session on the mountain, you’re going to want to read this comprehensive guide on how to do snowboard bindings correctly, to better optimize your performance.
Understanding Snowboard Bindings
Snowboarding is a thrilling sport that challenges your balancing skills, daring spirit, and love for wintry wonderlands. The rider’s performance on the powder or well-groomed slopes, to a large extent, depends on their connection with the board. This connection is bridged by those versatile snowboard bindings. But what are they exactly?
What are Snowboard Bindings?
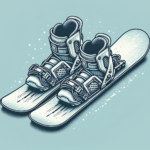
Think of snowboard bindings as the powerful intermediary channel between you (the rider) and your snowboard. They transfer the muscle movements of your legs and feet to the board. In simple terms, they are the direct interface that connects your boots to the snowboard, enabling you to turn, jump, and perform tricks on the snow.
Types of Snowboard Bindings
Snowboard bindings also come in different styles or types, tailored to fit specific styles of snowboarding. The three main types are strap-in bindings, rear-entry bindings, and step-on bindings. Their names are pretty self-explanatory. In strap-in bindings, you fasten your boots using straps. In rear-entry bindings, the highback tilts towards the tail end of the board, allowing quick boot entry and exit. The newest addition, step-on bindings, are easy to use as you can simply step in and click your boots onto the board.
Role of Snowboard Bindings
So, you may ask, why are snowboard bindings critical? They enable better control and easier maneuverability of the snowboard. By tightly securing the boots to the board, they ensure that any movement you make is efficiently transferred to the board. They play a crucial role in determining your speed, stability, and safety on the slopes.
Choosing the Right Binding Size
Measuring Your Boot Size
To choose the right snowboarding binding size, the first step is to measure your boot size accurately. This can be done by wearing your snowboarding socks and then trying on various boots for the most comfortable fit. Remember, comfort is key here, so don’t rush this process.
Determining the Right Binding Size
Now that you have your boot size, it’s time to select the right binding size. Snowboard bindings typically come in small, medium, and large sizes. Use the manufacturer’s size chart to match your boot size with the appropriate binding size. Your boot should fit snugly into the binding without any overhang, as this could affect your snowboarding experience.
Considerations for Choosing the Binding Size
When it comes to choosing the correct binding size, it is worth considering the brand of your board and bindings. While there is a universal size system, different brands may have slight variances. Make sure to read through customer reviews as they often provide insights into the size and fitting.
Choosing the Right Binding Style
Selecting the right style of bindings largely depends on your style of snowboarding. There are three primary styles, namely, freestyle, all-mountain, and freeride.
Freestyle Bindings
If you’re someone who loves to ride in the parks, pulling off daring jumps and tricks, then freestyle bindings are the best for you. They usually have a soft to medium flex, offer better mobility, and are lightweight than other bindings.
All-Mountain Bindings
As the name suggests, all-mountain bindings are suitable for all types of terrain. Flexible and versatile, these bindings are perfect if you love snowboarding down different types of trails. Whether it’s groomed runs, powder, or park rides, all-mountain bindings will not disappoint.
Freeride Bindings
For those who crave off-piste snowboarding and steep terrains, freeride bindings are the best bet. They come with a stiff flex which offers precision control and stability at high speeds. However, they are less forgiving than freestyle and all-mountain bindings.
Understanding Binding Components
As you delve deeper into the world of snowboarding, understanding different binding components is equally essential.
Highback
The highback is a vertical plate located at the back of the binding. By applying pressure onto the highback, you can dictate the speed and direction of board turns. The rigidity of the highback impacts its responsiveness—the stiffer it is, the more responsive the board.
Baseplate
The baseplate is the flat surface component that attaches directly onto the snowboard. Its purpose is to evenly distribute the rider’s weight across the length of the board.
Straps
Straps provide the critical function of securing your boots in the bindings. Two straps are common in most bindings: one at the ankle and the other over the toes. The more snugly they fit, the better will be the boots to binding energy transfer.
Cushioning
Cushioning in snowboard bindings enhances comfort and dampens high-speed vibrations. They are generally made of EVA foam and cover the baseplate and straps.
Mounting Snowboard Bindings
Tools Needed
First things first, assembling your board bindings requires some basic tools. You’ll need a good quality screwdriver or a binding-specific tool.
Attaching the Baseplate
The baseplate attaches directly onto the board. Align the holes of the baseplate with those on the board. Then, place the binding on top. The holes should all meet perfectly.
Screwing in the Bindings
Next, screw the bindings onto the board. Begin by pushing one screw into each hole until all are in place.
Adjusting the Highback
Finally, with everything in place, you might want to adjust the angle of the highback. This can be done by releasing the latch, adjusting the angle, and locking it back in place.
Setting up Your Stance
Determining Your Lead Foot
Understanding whether your left or right foot will lead is critical. A basic rule is that if you are left-footed, your left foot will lead (Regular stance), and if you are right-footed, your right foot will lead (Goofy stance).
Setting the Stance Width
Next comes setting up your stance width. This is the distance between your two feet when they are attached to the board. The ideal width is typically the width of your shoulders. However, you can adjust this to find your most comfortable stance.
Choosing the Stance Angle
This is where you decide your foot orientation. A common starting point is the “duck stance,” with both feet facing outward. From this point, it’s all about adjusting, experimenting, and settling on what works best for you.
Adjusting Your Bindings
Adjusting the Strap Length
The next step is adjusting the length of the straps. Your aim is to find a comfortable fit that holds your boot snugly in place.
Adjusting the Highback Angle
You may also want to tinker with your highback angle for better control and comfort. You can do this by unscrewing the highback, adjusting its angle, and then re-tightening the screws.
Fine-Tuning Your Stance
Your stance should be comfortable and natural. Don’t hesitate to play around with it until you find the perfect stance and highback angle that matches your snowboarding style.
Checking Your Setup
Ensuring Proper Boot Fit
Once you’ve mounted your bindings, now it’s time to ensure your boots fit properly. They must sit snug in your bindings and be comfortable yet supportive.
Testing Your Stance
By placing your boots into the bindings and standing on your board, you can test if the stance is comfortable and functional for you. Make sure you are not leaning back as you ride down, and you can comfortably shift your weight from edge to edge.
Checking for Loose parts
Close inspection is key to ensuring your safety. Make sure all screws are tight and all parts of your setup are securely fastened, with no loose bits hanging around.
Maintaining Your Bindings
Cleaning Your Bindings
After every snowboarding session, make sure to clean your bindings from debris or any residual moisture to prevent them from rusting or freezing.
Checking for Wear and Tear
Regularly look for any visible wear and tear signs, such as cracks in plastic parts, worn-out straps, or loose screws.
When to Replace Your Bindings
Over time and with regular usage, your bindings will naturally start to wear out. If they are showing significant wear, it’s a good idea to replace them. Fresh bindings undoubtedly enhance your snowboarding experience and, most critically, ensure your safety.
Top Tips for Snowboard Binding Setup
Reading the Manufacturer’s Instructions
Always take the time to read the manufacturer’s instructions. They provide invaluable insights, especially with specific brands or models.
Getting Professionally Fitted
Getting professionally fitted is the best way to reassure that all your gear is the right size and suited to your riding style.
Watching Online Tutorials
Watching online tutorials can be a huge help not only in setting up your gear but also in improving your skills and techniques.
Practicing before Hitting the Slopes
Before you hit the slopes on your freshly set-up board, practice on a gentle slope to familiarize yourself with your new setup and find any issues that may need a last minute tweak.
Remember, snowboarding is as safe and fun as you make it. So, grab your snowboarding gear, set up your bindings like a pro, and get ready for an exhilarating ride down the white, snowy slopes. Happy snowboarding!
- What Snowboard Bindings Should I Get? - January 23, 2024
- What Size Screws For Snowboard Bindings? - January 23, 2024
- How To Snowmobile On Water? - January 23, 2024


