Ever found yourself staring at unsightly scratches on your much-loved snowboard and wondering how on earth to get rid of them? Fret no more! In this article, you’ll learn how to fix those annoying scratches on your snowboard by yourself. With a little patience and some practical know-how, you’ll quickly turn those blemishes into distant memories and get your smooth ride back for the snowy terrain. So, buckle up and let’s get your board back in prime shape!
Identifying the Severity of the Scratch
Before you dive into repairing your snowboard, the first step is to identify the severity of the scratch. All scratches are not created equal and tackling each type requires a different approach.
Understanding the structure of a snowboard
In order to truly understand the severity of a scratch, you need to know about the structure of your snowboard. The basic structure of a snowboard usually comprises the top sheet, the core, and the base. While the top sheet is mainly cosmetic, the core and the base are keys to performance.
Distinguishing surface scratches from core damage
Scratches can occur on any of these three components. However, surface scratches and core damage are two different things. Surface scratches affect your board’s appearance, but won’t generally affect the performance. They are also relatively easy to repair. Alternatively, if the core of the board is damaged, it may significantly impact your snowboarding experience and often requires professional service.
Factors affecting the effects of scratches
Several factors like the location, depth, and length of the scratch can dramatically affect your snowboarding performance. For example, a scratch along the edge of the board might impair carving ability, while a deep scratch can collect snow and slow you down.
Gathering Necessary Tools and Materials
To fix the scratches on your snowboard, you’ll need specific tools and materials.
Choosing the right repair kit
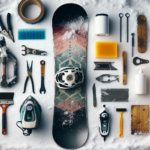
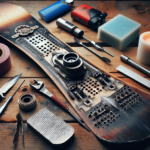
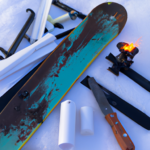
Having the proper repair kit at your disposal is key. A standard kit usually includes a P-Tex candle, which is used to fill in deep scratches, a scraper to remove excess P-Tex, and a wire brush to clean out the scratches.
Additional tools needed for the repair
Apart from the repair kit, you might need some additional handy tools – like a heat gun to melt the P-Tex, and clamps to hold your snowboard steady while working on it.
Safety equipment to consider
Repairing a scratch involves working with hot materials and sharp tools, so safety has to be your priority. Heat-resistant gloves and eye protection should be part of your safety arsenal.
Cleaning the Damaged Area
Before you begin the repair process, it’s crucial to properly clean the damaged area.
Why it’s important to clean before repair
Dirt and moisture can prevent the P-Tex from adhering properly, affect the end result of the repair, and, in worst-case scenarios, cause additional damage.
Using the right cleaning materials
You can simply use warm water and mild dish soap to clean the scratched area. An old toothbrush can be beneficial for cleaning the deeper scratches.
Allowing the area to dry completely before proceeding
For a successful repair, the scratch must be thoroughly dried. If you apply P-Tex on a wet surface, it may not adhere properly, leading to a poor quality repair.
Filling in Shallow Scratches
Shallow scratches are easier to deal with and can easily be filled in by yourself.
Identifying the appropriate filler material
To fill in shallow scratches, you can use a commercial base repair material, which usually comes in the form of a stick and can be rubbed into the scratch.
Applying the filler correctly
It is essential to ensure that the filler is applied evenly across the scratch. Too much filler will leave a bulky repair that spoils the smooth finish of your snowboard.
Drying times and considerations
After applying the filler, leave it to dry fully. Failure to do so could result in the filler not setting correctly, resulting in potential performance issues.
Repairing Deep Scratches
Deep scratches often require a bit more effort and the use of P-Tex.
When to know if a scratch is too deep for DIY repair
If the scratch has penetrated the base material and reached the core of the board, your DIY repair attempts may do more harm than good. In such cases, professional help is often the best and safest option.
Using a P-Tex candle for deep scratches
For scratches that are not deep enough to require professional attention, a P-Tex candle is ideal. P-Tex is a type of plastic that, when melted, is used to seal deep scratches on the base of your snowboard.
Allowing P-Tex to dry and cool properly
Once the P-Tex has been applied, it’s important to leave it to dry and cool down completely. Failure to do so could risk damaging both the P-Tex and the snowboard’s base.
Smoothing the Repaired Area
Post-repair, the snowboard’s surface is essential for optimal performance.
Importance of a smooth surface for performance
A smoother surface reduces friction with the snow, allowing for faster speeds, easier turning, and better overall performance.
Using a scraper post-repair
Once the P-Tex has fully cooled down and dried, use a scraper to remove excess material and smooth out the repaired area.
Smoothing techniques for best results
Using gentle, long strokes will help maintain an even and smooth finish. Be cautious not to dig the scraper into the P-Tex, as this could result in a repair that’s worse than the original scratch.
Reapplying the Wax
After you’ve repaired and smoothed out your scratch, you’ll need to reapply the wax.
Why re-waxing is necessary
Waxing renews the hydrophobic layer of your snowboard, which helps maintain speed and ensures smooth rides.
Choosing the right wax for your snowboard
There are various types of wax available, so you’ll need to consider factors like snow temperature and your personal snowboarding style when choosing the most suitable one.
Applying wax correctly to maintain optimal performance
Melting your wax and spreading it evenly over the board will help protect it from future scratches and keep it performing well.
Maintaining Your Snowboard Post-Repair
Even after successfully fixing a scratch, regular maintenance is essential for your snowboard’s longevity and optimal performance.
Regularly checking for new damage
Check your snowboard regularly for any new scratches as they can become severe if left untreated.
Periodic maintenance tasks
Periodic waxing and edge sharpening are imperative tasks for extending the life of your snowboard and enhancing its performance.
When to seek professional repair
Knowing when DIY fixes won’t suffice, and it’s time to seek professional help can save your board from irreversible damage.
Preventing Future Scratches
Prevention, as they say, is better than cure.
Techniques for safer snowboarding
By selecting trails within your skill level, paying attention to obstacles and potential hazards, and practicing good snowboarding technique, you can greatly reduce the risk of scratches.
Choosing the appropriate terrain
Different terrains demand different snowboarding techniques. Knowing your limits and the requirements of the terrain is key to prevention.
Proper snowboard storage and transportation
How you store and transport your snowboard can also play a significant role in preventing future scratches.
Troubleshooting Common Repair Problems
Even with all the right preparations and efforts, you might encounter some problems during the repair process.
Dealing with uneven repair surfaces
If your repair surface has turned out uneven, it’s usually because too much P-Tex has been applied or the scraper has removed more material than necessary. The solution lies in using light, even strokes with the scraper to gently remove the excess.
What to do if a repair comes undone
If a repair comes undone, it’s often because the scratch wasn’t cleaned or dried properly before repairing, or the P-Tex was not allowed to dry fully. In this case, you’d need to re-do the repair, ensuring that all steps are followed correctly.
Addressing discoloration or blemishing from repair process
Discoloration or blemishing can occur after a repair. While it might not look aesthetically pleasing, it doesn’t affect your snowboard’s performance. However, if it bothers you, consider getting a professional service to restore your board’s appearance.
- What Snowboard Bindings Should I Get? - January 23, 2024
- What Size Screws For Snowboard Bindings? - January 23, 2024
- How To Snowmobile On Water? - January 23, 2024

