Are you intrigued by the concept of snowshoeing and want to try it out? This article is perfect for you. With a step-by-step guide on crafting your own pair of snowshoes, it offers a unique combination of a hands-on DIY project and the chance to explore an exciting outdoor activity. It ensures you’re well prepared to tread confidently through the powdery snow, with complete knowledge regarding the construction and use of your homemade snowshoes. Prepare yourself for a thrilling winter adventure!
Understanding the Basic Structure of Snowshoes
To embark upon the journey of creating your own snowshoes, a solid understanding of the basic structure and design of these important winter tools is essential. From the types to their core components, the general structure is important for a successful result.
Types of Snowshoes
Snowshoes come in various designs and styles, each constructed to serve a specific purpose or terrain. The main types include traditional/classic snowshoes which are made out of wood and rawhide, recreational snowshoes which are ideal for beginners and are perfect for light hiking, expedition snowshoes designed for long distance hikes and extreme conditions, and racing snowshoes which are lightweight with a slim design for speed. Each type varies in its structure, materials, and size.
Components of a Snowshoe
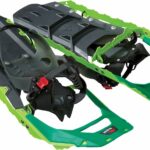
Snowshoes are made up of a frame, decking, bindings, and crampons. The frame is the outer part that gives the snowshoe its shape, it’s usually oval or teardrop-shaped. The decking is the webbing that fills the frame, providing support and preventing you from sinking into the snow. The bindings are what hold your feet onto the snowshoes, and the crampons provide traction.
Size and Shape Considerations
When designing your snowshoe, size and shape are of great importance. Larger snowshoes offer more flotation in deep snow; smaller ones are more maneuverable and better suit packed snow or trails. The shape can be oval, circular, or teardrop; each offers its advantages.
Tools and Materials Required
Creating your own snowshoes calls for the right tools and materials. It’s essential to gather all these before you begin the process.
List of Tools Necessary
You will need woodworking tools to make your snowshoes. These include a saw, a knife, a mallet, a measuring tape, a drill, a clamp, as well as sandpaper. Different stages require different tools.
Types of Wood Suitable for Snowshoes
When it comes to wood, choosing a light, flexible, and sturdy kind is necessary. Ash and hickory are ideal since both have the required qualities. They are flexible enough to be bent into shape without breaking, but sturdy enough to withhold the weight on snow.
Hardware and Binding Materials
For hardware, you will need brass or stainless steel screws, bolts, and brackets. For the bindings, leather or synthetic straps are commonly used. The choice should be made depending on the environment and personal preferences.
Preparing the Wood
The journey of making your snowshoes inevitably begins with preparation of the wood.
Selecting and Buying the Wood
When choosing wood, look for pieces that are straight-grained, free of knots, and that allow for reasonable bending. Ash or hickory are preferred for their durability and flexibility. Ensure you have enough material for the frame and crossbars of your snowshoes.
Cutting the Wood to Length
Cut the strips to the length required for your shoes. This depends on the style and size of your snowshoes. Remember to account for additional length for the bends in the wood.
Soaking and Bending the Wood
To bend the wood, soak the strips in water for at least a few hours or several days. Soaking will soften the molecular structure of the wood, making it more pliant. After soaking, begin to gradually and carefully bend the strips into the shape of your snowshoe frame.
Constructing the Frame
The frame forms the outer shape of your snowshoe and provides its structure and stability.
Bending the Wood into Shape
After soaking, use a form or jig to bend the wood into the desired shape, whether that’s oval or teardrop. Make sure to do this gradually to avoid cracking or breaking the wood.
Joining the Ends of the Frame
Once the shape is formed, the next step is to join the ends together. This can typically be done using screws or bolts and a bracket. Ensure this joint is sturdy as it is a critical part of the snowshoe’s structural integrity.
Adding Crossbars for Support
Crossbars are added across the frame to provide additional support and help maintain the shape. Typically, two crossbars are used: one close to the toe of the snowshoe and another closer to the heel.
Weaving the Webbing
The webbing or decking fills the frame of the snowshoe, providing flotation on snow.
Choosing the Webbing Material
Traditional snowshoes use rawhide strips for webbing, but synthetic materials are also popular due to their resistance to water and durability. Pick the material that suits your needs best.
Starting the Webbing Weave
Start weaving near one of the crossbars and work your way across. The spacing of your weave depends on what you require from your snowshoe. A tighter weave gives more support but less flotation, while a looser weave gives more flotation but less support.
Finishing the Webbing Weave
When you finish, ensure the webbing is securely attached to the frame. Whether by knotting the ends or adding additional securing hardware, it’s crucial that the webbing remains secure.
Assembling the Snowshoes
After the frame and webbing are prepared, it’s time for final assembly.
Attaching the Webbing to the Frame
Fix the webbing onto the frame and make sure it is tight and secure. This is typically done by weaving the end of the webbing through holes drilled in the frame, and securing either with a knot or additional hardware.
Applying Protective Sealant to the Frame
Once everything is in place, apply a protective sealant to the wood. This will shield it from weather damage and improve longevity.
Allowing the Snowshoes to Dry
After applying sealant, the snowshoes must be set aside to dry. This time can vary depending on the type of sealant used.
Adding the Bindings
Bindings secure your boots to the snowshoes, ensuring your steps control the shoe’s movement.
Choosing the Right Binding Material
Select a material that is strong and durable. Leather or synthetic bindings are common. Some prefer rubber bindings for their flexibility and durability.
Attaching the Bindings to the Snowshoes
The bindings should be attached near the snowshoe’s balance point. They typically run across the top of the foot and around the heel.
Adjusting the Bindings for Fit
Once attached, adjust the bindings to meet the size and shape of your boots. Remember, you want a snug but comfortable fit.
Testing Your Snowshoes
It’s important to test the snowshoes before hitting the trails. It helps ensure safety and effectiveness.
Checking Your Snowshoes for Strength and Durability
Inspect the finished snowshoes carefully. Check for any weak spots, especially at joins or where the bindings attach. Test the flex of the snowshoe and listen for any creaking.
Trying Your Snowshoes in the Snow
There’s no better place to test snowshoes than on the snow! Try them in various conditions: deep snow, packed snow, sloping terrain. Ensure everything feels right.
Making Necessary Adjustments
After testing, adjustments may be necessary. This could mean tightening bindings, adding additional sealant, or patching up weak areas of the webbing.
Maintaining Your Snowshoes
Now that you’ve made them, proper maintenance is key to prolonging the life of your handmade snowshoes.
Cleaning Your Snowshoes
After your snowy adventures, clean off any snow or ice build-up. Dry thoroughly to prevent dampness from damaging the materials.
Inspecting Snowshoes for Damage after Use
Check for any wear and tear or potential damage to the frame, webbing, or bindings.
Storing Your Snowshoes Correctly
Store your snowshoes in a dry, cool place and keep them away from direct sunlight or heat sources.
Conclusion: The Benefits of Making Your Own Snowshoes
Creating your own snowshoes offers various benefits from personal satisfaction to cultivating a unique skillset.
Sharing Your Snowshoe Making Experience
By sharing your snowshoe-making journey, you inspire others to embrace this rewarding craft and connect with like-minded individuals.
The Satisfaction of Using Your Own Hand-made Snowshoes
The joy and pride of using snowshoes crafted by your own hands is unparalleled.
Creating a Skill that can be Passed Down
Once you’ve mastered the art of making snowshoes, it’s a skill that can be passed down for generations, keeping this unique craft alive.
In conclusion, while making your own snowshoes is not a task to be undertaken lightly, the satisfaction and rewards of doing so are well worth the effort.
- What Snowboard Bindings Should I Get? - January 23, 2024
- What Size Screws For Snowboard Bindings? - January 23, 2024
- How To Snowmobile On Water? - January 23, 2024


