Whether you’re a seasoned boarder or just starting out, knowing how to Ptex your snowboard is a crucial skill. Ptex helps mend those pesky scratches and dings that can slow your ride down, hinder performance and overall enjoyment on the slopes. This article breaks it down for you on how to Ptex your board like a pro, providing in-depth knowledge, step-by-step guides, and empowering you to take even greater care of your gear. Even if you’re a beginner, don’t worry, because by the end, you’ll achieve a professional touch in handling your snowboard.
Understanding Ptex and its Uses
Ptex is an essential part of any avid snowboarder’s toolbox. With the ability to repair minor damages to your snowboard’s base yourself, you’ll save on maintenance costs and have your board ready for action faster.
What is Ptex?
Ptex is essentially a high-density polyethylene, which is the same material used in the base of snowboards. This plastic is known for its impressive durability, smoothness, and low friction levels – all qualities that make it perfect for gliding through snow. It comes in both clear and black forms, making it suitable for different types of snowboards.
Importance and Benefits of Using Ptex in Snowboards
Using Ptex isn’t just about repairing damages; it’s about prolonging the lifespan of your snowboard. Regularly applying Ptex to fill in any scrapes or gouges keeps the base smooth and ensures optimum performance. With Ptex, you can restore your snowboard’s performance to almost new state, ensuring that you don’t have to pay for a new snowboard earlier than necessary.
Common Situations Where Ptex is Necessary
Ptex becomes necessary in situations where your snowboard may begin to show signs of wear and tear. Some common signs that your snowboard may need some Ptex loving are scratches, gouges, or cuts on the underside of your board. These may result from running your board over rocks or other harsh terrain, or even accidents during your snowboarding adventures.
Preparation for the Ptex Process
As with any repair job, the process of applying Ptex to a snowboard requires some preparation.
Procuring the Necessary Tools and Materials
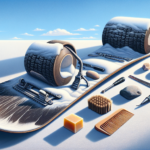
Before you can begin, you’ll need a Ptex candle, metal scraper, lighter, sandpaper, and a wire brush. If you can’t find a Ptex candle, you can alternatively use Ptex string.
Setting Up Your Workspace
Ensure you have ample light and space to work comfortably. A workbench or a sturdy table would be ideal for this. Make sure the area is well-ventilated as the wax and Ptex used during this process could create fumes that are harmful when inhaled in a close environment.
Preparing Your Snowboard
The snowboard should be dry and free of any loose debris before you begin the Ptex process. You can clean it using a cloth or an old toothbrush to get rid of dirt and any loose bits of snow.
Assessing Snowboard Damage
Before you begin the Ptex process, it’s crucial to understand the extent of the damage on your board and whether Ptex is indeed the right solution.
Identifying the Type of Damage
damages to your snowboard could be anything from scratches, gouges, or cuts. Ptex is ideal for treating minor dents and scratches to your board’s base.
Deciding if Ptex is the Appropriate Solution
Not all damages need Ptex. In some cases, minor scratches can be dealt with by merely waxing the board. However, deep gouges and cuts require Ptex to fill them and restore your snowboard’s integrity and performance.
Areas that Require Ptex Treatment
Essentially, any area on your snowboard’s base that shows signs of damage could potentially benefit from Ptex treatment. However, you should primarily focus on filling in deep gouges and ensuring that no part of your board’s core is exposed.
Clean the Snowboard Before Ptexing
A clean snowboard is crucial for a successful Ptex application. Any dirt or debris left on the board could prevent the Ptex from adhering properly.
Why Cleanliness Matters Before Ptexing
A clean base will ensure that the Ptex has a direct contact with the actual snowboard surface, meaning it will adhere strongly, creating a reliable repair.
Steps to Clean Your Snowboard Properly
Cleaning your snowboard involves removing any dust or debris from the damaged area. Using a cloth, brush off any loose particles. You can use a hairdryer to ensure the area is completely dry before proceeding.
Materials to be used in Cleaning the Board
A soft cloth, a soft brush, and a hairdryer should suffice to clean your snowboard. In some cases, using a mild soapy solution might be necessary to get rid of any stubborn dirt or grime.
The Ptex Process
Now that your snowboard is clean and ready, it’s time to get down to the actual Ptex process.
Step-by-Step Guide to Ptex Your Snowboard
- Light the Ptex candle with your lighter. Keep it lit until the flame turns blue. This will result in the Ptex melting and dripping.
- Drip the Ptex into the damaged areas on your snowboard. Ensure that you adequately fill every gouge.
- Let the Ptex cool for at least 20 minutes.
- Once fully hardened, you can then scrape off the excess Ptex using your metal scraper.
Mistakes to Avoid While Ptexing your Board
While the Ptex process is relatively straightforward, there are a few common mistakes to avoid. First, avoid rushing the process. Allow the Ptex to melt and cool adequately to ensure best results. Another common mistake is failing to fill the gouges properly. Make sure that each damage is filled completely with the Ptex.
Importance of Taking Your Time During the Ptex Process
Patience is the key to an effective Ptex repair. The more time you take, the better your results will be. By rushing the melting or cooling process, you risk creating an uneven repair that could affect your board’s performance.
Dealing with Deep Gouges
Deep gouges on your snowboard base will need more care and attention during the Ptex process.
Identifying Deep Gouges
Deep gouges can be identified easily as they are larger and deeper than regular scratches. In some instances, you may even see the core material of your board.
Specific Steps and Techniques for Treating Deep Gouges
For deep gouges, you might have to drip more Ptex to ensure that they’re adequately filled. Provide enough time for the Ptex to harden before moving on to the next step. In some cases, applying a second layer of Ptex might be necessary.
When to Seek Professional Help
If the damaged area is extensive or reaches the snowboard’s core, or if you’re unsure about the process, it’s ideal to seek professional help. Likewise, a persistent or reoccurring gouge that doesn’t seem to hold Ptex may also require a professional’s touch.
Allowing Adequate Cooling Time
One of the most overlooked yet vital aspects of the Ptex process is allowing for sufficient cooling.
Understanding the Importance of Cooling
Cooling is necessary for the Ptex to adhere properly to the snowboard’s base. Without adequate cooling time, the Ptex may not harden completely, which could result in an ineffective repair job.
Guidelines for Ideal Cooling Times
In most cases, about 20-30 minutes should be sufficient cooling time. However, if you’re repairing a particularly deep gouge, you might want to let it cool a bit longer. Cooling time may also depend on the room temperature. If it’s particularly cold, the Ptex might harden quicker.
Methods to Speed Up the Cooling Process
If you’re in a hurry, you can place your snowboard in a cooler area or use a fan to expedite the cooling process. However, remember that naturally cooled Ptex tends to be more durable.
Smoothing the Repaired Area
Once the Ptex has sufficiently cooled, the next step is to smooth the repaired area.
Techniques for Smoothing After Ptex
Smoothing your snowboard after Ptex involves scraping off the excess Ptex using a metal scraper. Be careful not to apply too much pressure or you might end up scraping off the newly applied Ptex. The goal is to ensure the filled gouges are level with the rest of the base.
Tools that can Assist in the Smoothing Process
A metal scraper is the primary tool used to smooth the base after Ptex repair. Some snowboarders also use a base scraper for a smoother finish.
Defining a Finished, Smoothed Surface
A fully smoothed surface should be as flat as your snowboard’s original base. The repaired areas should not have any bulging or uneven areas.
Applying the Finishing Touches
After the Ptex repair and smoothing, it’s time to apply the final touches to bring your board back to top-notch performance.
Waxing the Board After Ptex Repair
After preparing the surface with Ptex, it’s time to wax your board. Warm up your iron and apply the wax to the base of your board for a seamless glide on the snow.
Overall Board Inspections Post-Ptex
Once you’ve completed the Ptex repair and waxing, it’s essential to inspect your board to ensure that no area has been overlooked. Check especially the edges and other areas prone to normal wear and tear.
Storage Tips After Ptex Application
Storing your snowboard properly plays a crucial role in maintaining its quality and longevity. Keep your snowboard in a dry and cool place. Always remember to dry your snowboard thoroughly before storage to prevent rust and other damages.
Maintaining Your Snowboard Post-Ptex
Proper maintenance of your snowboard extends its life and ensures optimal performance.
Routine Inspection After Ptex Treatment
Regularly inspect your snowboard post-Ptex treatment. Check for any signs of damages or any areas that need additional repairs.
Preventing Future Damages
While some wear and tear is inevitable, there are steps you can take to minimize future damages. Avoid snowboarding over rocky terrain, and make sure to clean and dry your board after each use.
Best Practices for Snowboard Care
Regularly waxing your board is one of the best ways to maintain it. Good storage practices also go a long way in prolonging your snowboard’s lifespan.
In conclusion, mastering the art of Ptex repair can save you both time and money, keeping your equipment in top shape so you can hit the slopes with confidence. Remember, patience is key in Ptex repairs, so take your time and yield great results.
- What Snowboard Bindings Should I Get? - January 23, 2024
- What Size Screws For Snowboard Bindings? - January 23, 2024
- How To Snowmobile On Water? - January 23, 2024


