Are you looking to tackle the challenges of rebuilding your snowmobile clutch? Get ready to master this skill with a step-by-step guide on how to refurbish your own snowmobile clutch. Don’t be daunted by the task – whether you’re a seasoned mechanic or an adventurous beginner, this article will equip you with the knowledge and confidence you need to have your snowmobile roaring back on the winter trails in no time.
Understanding The Snowmobile Clutch
Snowmobiles are not only fun to ride, but they also have a unique drivetrain that sets them apart from other vehicles. In snowmobiles, power is transferred from the engine to the track with the help of a snowmobile clutch. Understanding how your snowmobile’s clutch works can not only improve your ride but also help you diagnose potential problems.
Clutch Design and Function
At the most basic level, a snowmobile clutch is made up of a series of moving parts that use friction to transfer power from the engine to the track. When the engine’s RPM increases, the clutch employs centrifugal force to push outwards on the clutch shoes. This force is transferred to the drive belt, which then powers the track.
Types of Snowmobile Clutches
There are two types of snowmobile clutches: primary (or drive) clutch and the secondary (or driven) clutch. The primary clutch is connected directly to the engine, whereas the secondary clutch is mounted on the jackshaft. When the RPM of the engine increases, the primary clutch grips the drive belt tighter, causing the secondary clutch to open up and increase the speed of the snowmobile.
How a Clutch Works
As you fire up your ride, your engine starts to spin the primary clutch that holds the drive belt. The more you rev the engine, the more the primary clutch engages the belt, transferring power to your secondary clutch, which in turn transfers power to your track. When the engine RPMs drop, the clutches disengage, stopping the power transfer.
Identifying Snowmobile Clutch Problems
Your snowmobile’s clutch is prone to wear and tear, just like any other vehicle part. Regular checks and tuning can help you identify potential problems.
Signs of Worn Out Clutch
A worn-out clutch may result in poor performance and decreased fuel efficiency. Other common symptoms include unusual noises, difficulty accelerating, and even complete loss of power transfer.
Effects of a Faulty Clutch
A faulty clutch can compromise your snowmobiling experience. You may experience slower acceleration, decreased top speed or poor backshifting when coming out of a corner. Overheating and excessive wear on the belt are also common issues arising from a bad clutch.
Consequences of Not Fixing the Clutch
Ignoring issues with the clutch can lead to more severe problems in the future. You may damage the drivetrain, cause belt failure, and even put your safety at risk due to sudden power loss while riding. Not to mention the unnecessary strain it puts on your engine and the potential for costly repairs.
Preparing for Clutch Rebuilding
When a clutch replacement becomes unavoidable, you need to gear up for the task.
Tools Needed for the Task
You’ll need some specific tools to complete this job. A clutch puller and compressor will assist in removing and installing the springs and helix. Other handy tools include ratchet set, specialty sockets, Allen wrenches, Torx drivers, and a clean workspace where you can organize your parts and tools.
Safety Precautions and Tips
When working with clutch components, always wear appropriate safety gear, including safety glasses and gloves. Keep your workspace clean and organized to avoid losing any small components. And make sure to follow manufacturer guidelines during disassembly and assembly of clutch components.
Understanding the Parts and their Placement
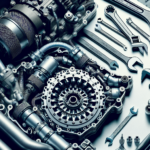
A typical snowmobile clutch consists of the cover, clutch springs, cam arms, helix, and clutch hub. It’s crucial to understand where each part goes and how it functions before starting your replacement job. Drawing a diagram or taking pictures might help you better remember the placement of each component.
Removing The Old Clutch
As with most mechanical tasks, the first step in rebuilding the clutch is removing the old one.
Steps to Disconnect the Clutch
Begin by securing your snowmobile and shutting off the engine. Locate the primary clutch, usually on the right side of the engine. Using a clutch puller, carefully remove the primary clutch from the engine’s crankshaft. Follow up by removing the secondary clutch the same way.
Keeping Track of the Parts
As each component is removed, make sure to organize them in the order they were removed. This will help you remember how to reinstall them correctly later on.
Dealing with Stuck Pins or Bolts
Stuck parts can cause headaches during disassembly. However, with a little patience, most stuck parts like bolts or pins can be worked loose with penetrant spray and gentle tapping. Be careful not to damage the threads or the component while trying to free it.
Inspecting The Clutch Components
After removing your clutch, you’ll want to inspect all the components for any signs of wear.
Checking for Wear and Tear
Examine all the components closely, checking for wear and tear. Keep an eye out for worn-out bushings, cracked or broken springs, or any other damage that could have led to clutch failure.
Assessing the Clutch Springs
The clutch springs play a massive role in how your clutch performs. If the springs have minimal tension or show any signs of damage, they will need to be replaced.
Identifying Faulty Clutch Weights
Finally, the weights, also known as cam arms, can become worn and cause issues. If they’re hollow, you can check them for any loose debris that might be affecting their function.
Choosing The Right Replacement Part
After inspection, the next step is to decide what replacement parts you’ll need.
Different Types of Clutch Parts
Clutch parts include everything from bushings to springs, helixes, and weights. It’s essential to understand the function of each part and how they work together before deciding what will need replacing in your clutch.
Selected Based on Snowmobile Model
When choosing replacement parts, make sure they’re compatible with your snowmobile’s model. Incorrect parts can cause compatibility issues and further damage.
Choosing Between OEM and Aftermarket Parts
While OEM parts ensure compatibility and reliability, aftermarket brands can offer similar quality at a lower price. The choice depends on your personal preference and budget.
Installing The New Clutch Parts
Once you have the right parts, it’s time to begin the reassembly process.
Procedure to Follow
Start by reinstalling the helix on the secondary clutch, followed by the secondary spring. Proceed with the installation of primary spring and weights on the primary clutch. Remember to tighten bolts and pin carefully to the manufacturer’s specifications.
Aligning the Parts Correctly
Make sure to align all parts correctly as per your reference diagram or photos. Improper alignment may cause the clutch to malfunction and damage parts.
Tips for Trouble-Free Installation
While installing new parts, lubricate all moving parts with dry graphite or another suitable grease to ensure smooth operation. Regularly check alignment and balance to avoid unnecessary wear.
Reassembling The Clutch
The next step includes putting all of the components back together in the correct order.
Steps for Reassembly
Begin by reassembling the secondary clutch. Next, mount the primary clutch back onto the engine’s crankshaft. Follow the process in reverse order of disassembly and ensure all components are sitting correctly.
Ensuring Correct Placement of Parts
Refer to your initial diagram or photos during the reassembly process to guarantee each part is in its correct position.
Checking the Function Before Finalizing Installation
Before you finish the installation, double-check everything. Ensure that the clutch opens and closes smoothly when you manually rotate it and that all parts are properly aligned.
Testing The Newly Rebuilt Clutch
All that’s left to do now is test your rebuilt clutch.
Smoothness of Operation
Start your snowmobile and pay attention to the clutch operation. Check for smooth engagement and release. Any hiccups could be signs of improper installation or alignment.
Noise or Vibration
Excessive noise or vibration could indicate problems with balance or a part installation issue. If you experience any of these symptoms after rebuilding your clutch, it might be worth going back to check your work.
Overall Performance in Different Conditions
Test your snowmobile in different conditions, from a cold start to warm operation, and different speeds. If your snowmobile performs well across all scenarios, you’ve likely done a successful rebuild.
Maintaining Your Rebuilt Clutch
Lastly, let’s discuss how to maintain your newly rebuilt clutch so it can deliver optimum performance for an extended period.
Routine Checks and Adjustments
Perform routine checks and adjustments a few times a season based on manufacturer recommendations to ensure your clutch stays in top shape.
Cleaning and Lubrication
Keeping your clutch clean and well-lubricated can greatly extend its lifespan. Use a clutch-specific cleaner to remove any dirt or dust buildup and lubricate parts as recommended by the manufacturer.
When to Consider Another Rebuild
With proper maintenance, your rebuilt clutch should last many seasons. However, remember to keep an eye out for signs of wear and performance issues. A drop in performance might indicate that it’s time for another rebuild.
Living the snowmobile life means understanding the ins and outs of your sleigh’s mechanics. Now that you have a better understanding of the snowmobile clutch, you can ensure peak performance from your machine and stay ahead of any problems. Happy snowmobiling!
- What Snowboard Bindings Should I Get? - January 23, 2024
- What Size Screws For Snowboard Bindings? - January 23, 2024
- How To Snowmobile On Water? - January 23, 2024

