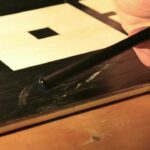
You’ve had a great season on the slopes, but now your snowboard base has some unwelcome gouges detracting from its smooth finish. Don’t toss it in the corner just yet! In this article, “How To Repair Gouges In Snowboard Base?” you’ll discover how you can restore your snowboard to its former glory with practical, straightforward instructions. So, grab your tools, and prepare to be your own personal snowboard mechanic!
Understanding the Different Types of Snowboard Damage
Snowboarding is a thrilling sport but it takes a toll on your gear. Over time, your snowboard base may show signs of wear and tear. Understanding the different types of snowboard damage not only helps keep your board in optimal condition, but it also ensures your safety while hitting the slopes.
Identifying Shallow Scratches
Shallow scratches are as common as falling on the slopes. They may seem harmless on the surface but over time, if left untreated, they can lead to deeper gouges. It’s important to watch out for those minor dings and scuffs appearing on the base of your snowboard.
Detecting Deep Gouges
Deep gouges are more destructive than their shallow counterparts. They penetrate deeper into the snowboard base, sometimes revealing the core. The tricky part about these little monsters is that they’re not always visible to untrained eyes. You may need to feel for dips or cuts on the board’s surface to spot them.
Spotting Core Shots
These are the heavyweight champions of snowboard damage. Core shots go all the way through the base material, exposing the board’s core. Snow getting into these spots can cause water logging and further damage if left untreated. So, if you notice any puncture-like holes or spots where the colorful base material is missing, beware, you might have a core shot on your hands.
Comprehending Edge and Sidewall Damages
Edges play a key role in carving turns on the slope so it’s absolutely necessary to keep them in good shape. Sidewall, although not as critical, can also suffer damage through impacts. Look for sharp, irregularities, dings or rust on edges and chip or cracks on the sidewall.
Tools Required for Snowboard Base Gouge Repair
Damage is inevitable but fear not! With the right tools, most of the damage to your snowboard can be addressed easily.
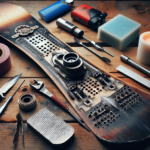
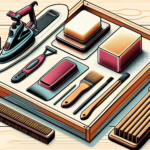
P-Tex Candles
P-Tex candles are the magic wands in the world of snowboard repair. They’re used to fill up scratches, gouges and holes on the board’s base, making it smooth and ready for another ride down the mountain.
Metal Scraper
A metal scraper will come in handy to smooth the repaired area and finish the job by removing excess P-Tex.
Lighter
A lighter is used to ignite the P-Tex candle and melt it. Remember, though, safety is always paramount, so always use it responsibly!
Knife or Razor
A knife or a razor is used to carefully remove any loose materials from the damage site before applying P-Tex.
About P-Tex Repair
P-Tex is a versatile repair agent that comes in handy when dealing with board damage.
Understanding what P-Tex is
P-Tex, short for Polyethylene, is the chief material used to make snowboard bases. Being the same material as your base, it’s perfect for filling up gouges and holes, post repair it becomes an integral part of your snowboard base.
Choosing the Right P-Tex
P-Tex candles are available in clear or black. While the color isn’t necessarily a key factor in choosing P-Tex, it does increase the aesthetic appeal when choosing a color matching your snowboard base.
Safety Measures While Using P-Tex
Using P-Tex safely means using it responsibly. Always work in a well-ventilated area and keep a fire extinguisher close by. When lighting P-Tex, avoid creating excessive smoke or flames. Remember, P-Tex drips can be very hot!
Preparation Before Repair
Preparation is half the battle won. A well-prepared base will make the repair process smoother and the result more durable.
Cleaning the Snowboard
Before starting the repair process, it’s crucial to clean your snowboard. Any dirt or wax residue can interfere with the adhesion of P-Tex.
Drying the Board
Just like dirt, water too can hamper the P-Tex adherence. Ensure you thoroughly dry the board before moving on.
Removing Any Loose Material In and Around Damage
You can use an edge tool or a knife to gently scrape away any loose base material, thus preparing your board for P-Tex application.
Fixing Minor Scratches
Minor scratches are frequent and can be repaired at home effortlessly.
Melt the P-Tex Candle
Using a lighter, gently ignite the P-Tex candle. Allow it to burn until it starts dripping and then move it above out of flame to avoid soot.
Apply Light Layer of P-Tex Into Scratch
Using the dripping hot P-Tex, carefully fill the scratch, ensuring that you avoid forming bubbles.
Allow P-Tex To Dry and Harden
Normally, P-Tex takes 30 minutes to an hour to cool and harden. However, for best results let it cool overnight.
Scrape Off Excess P-Tex
Using the metal scraper, gently scrape off excess P-Tex from your board.
Repairing Deep Gouges
Deep gouges are tricky but can be fixed with a bit more patience and time.
Locating and Preparing the Gouge
Ensure you feel and visually inspect the gouge before starting to fill it with P-Tex.
Allowing for Ample Reparation Time
Repairing deep gouges may require multiple layers of P-Tex. Ensure each layer is completely dry before adding another layer to it.
Application of P-Tex and Process Repeat if Necessary
Just like fixing minor scratches, you will fill the gouge with P-Tex. Remember, better slow and steady than rushing here. Allow the P-Tex to dry and harden before moving to the next step.
Polishing Off Repaired Area
Scrape off excess P-Tex and then buff and polish the area until it feels smooth.
Overcoming Core Shots
Core shots are more severe compared to gouges, often exposing the board’s core. It’s recommended to get these fixed by professionals.
Understanding the Severity of Core Shots
Core shots are the most serious kind of snowboard base damage. Even a small core shot can cause bigger problems like water logging or structural failure if left untreated.
Sourcing Professional Repair if Required
Since core shots expose the board’s core, the damage goes beyond the base material. This necessitates the expertise of a professional repair technician.
DIY Core Shot Repair Process
If the core shot is not too severe, with the right tools and materials like epoxy and a patch, you can fix it at home. Similar to gouges, clean the area, apply epoxy, and follow it by a patch. Allow it to cure before hitting the slopes.
Edge and Sidewall Damage Repair
Edge and sidewall damage can hinder your capability to turn and control your snowboard.
Identifying Edge and Sidewall Damage
Beyond obvious signs like a deformed or missing edge, small dings or rust can also indicate edge damage. In case of sidewall, look for big cuts or punctures.
Deciding on Home Repair or Professional Service
Minor edge damage like rust can be taken care of at home with a sharpener. However, a cracked or broken edge requires professional attention. Same goes for sidewall, minor cuts can be dealt with epoxy but anything deeper is a professional’s job.
Following Proper Techniques for Edge and Sidewall Repair
Edge sharpening or epoxying a cut on sidewall should be done after understanding the proper techniques to avoid further damage and to ensure a lasting repair.
Final Touches of Repair
Just as an artist admires their painting after finishing it, you, too, will want to look at your handy work and make sure it is perfectly done.
Smoothing out the Repaired Surface
Use your scraper and sandpaper to smooth the repaired area and blend it with the surrounding base material.
Checking for Any Missed Damages
Once your repair job is done, go over the base one more time to ensure you didn’t miss anything.
Polishing the Board for Deeper Repairs
For deeper repairs, polish the board for a final finish. Ensure you wax your board before heading back to the slopes.
Maintaining Your Snowboard Post-Repair
Proper care and maintenance can keep your snowboard in good working order for years to come.
Proper Snowboard Storage Practices
Always store your snowboard in a cool, dry place away from direct sunlight to avoid warping or other potential damage.
Regular Snowboard Inspections
Regular inspections will help you catch minor problems before they turn into major issues.
Understanding the Importance of Correct Snowboard Maintenance
Regular care and maintenance not only prolongs the lifespan of your board, but it also makes snowboarding safer and more fun. Never ignore the signs of damage, however small they may seem. Regular care, timely repairs and proper storage are key to the longevity of your snowboard.
- What Snowboard Bindings Should I Get? - January 23, 2024
- What Size Screws For Snowboard Bindings? - January 23, 2024
- How To Snowmobile On Water? - January 23, 2024

