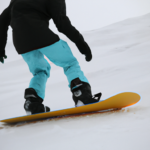
You’ve finally decided to get that snowboard off the shelf but before you gear up and head to the slopes, there’s one crucial step: setting up your snowboard stance. This article will provide you with a step-by-step guide on setting the right snowboard stance to ensure your balance and comfort. Say goodbye to those gnarly falls and say hello to effortless carving down the mountainside!
Understanding the Basics of Snowboard Stance
Mastering snowboarding is a fascinating journey. Before diving into the wild excitement of slashing pow or flying through the air, it’s critical to understand the fundamentals that hold everything together. Foundation is everything. That’s where the tricky world of ‘snowboard stance’ comes into the picture.
Identifying regular or goofy foot
The starting point of your snowboard stance adventure is to figure out whether you’re a regular or a goofy foot rider. If you automatically put your left foot forward (akin to when you’re sliding on a patch of ice), you fall into the ‘Regular’ category. But if you prefer your right foot leading, you’re a ‘Goofy.’ Don’t worry, there’s no rhyme or reason to it, and neither is better than the other.
Defining what is stance
Aside from being a neat term, what exactly is ‘stance’? Well, in snowboarding, ‘stance’ pertains to the positioning of your body and feet on the snowboard. It dictates how you interact with the board, how the board reacts to your movements, and ultimately impacts your overall ride experience.
The importance of proper stance on a snowboard
A correct stance will allow you to manipulate your snowboard with finesse, enabling smooth turns, power in your jumps, and steadiness on your rides. Besides affecting performance, a good stance will also guard against excessive strain on your body, keeping fatigue at bay, and reduce your chances of an injury.
Considering Your Riding Style
As unique as each snowflake that makes up the perfect pow, your riding style is a big deal, particularly when determining your ideal stance.
Discussing different riding styles
Snowboarding styles can range from freestyle, all-mountain, freeride, to alpine or carving. Each style is characterized by distinctive techniques and each takes place in different terrains. Thus, each requires its own stance to optimise control, balance, and enjoyment.
How riding style may affect your stance
The chosen riding style influences your stance as it decides how you distribute your weight on the board. For example, a freestyler might prefer a centered stance to facilitate switch riding, while a freerider may opt for a set-back stance to give them more power when plowing through fresh snow.
Adapting stance based on riding style
Since no two riders are exactly alike, it’s important to experiment and adapt your stance based on what feels most comfortable and efficient for your style. Don’t be afraid to play around with your binding positions until you find your sweet spot.
Determining Your Stance Width
The width of your stance is as crucial as the angle. Finding the ideal balance will enhance your board control and make your rides more satisfying.
Guidelines for stance width
A quick hack to find your sweet spot is to start with a stance width roughly as wide as your shoulders. This allows you to balance naturally and access a full range of movement. Of course, the right stance width varies for everyone, so feel free to adjust accordingly.
Effects of a wider stance
A wider stance offers more stability, which is handy for landing jumps or riding at high speeds. However, it could also limit your mobility, making it tougher to execute quick, tight turns.
Effects of a narrower stance
Conversely, a narrower stance enhances agility, allowing for quicker edge-to-edge transitions. But watch out, too narrow a stance might compromise balance and make it harder to maintain control.
Tips to find the optimal stance width
The best way to find your optimal stance width is experimenting on gentle terrains. Adjust your binding setup, take a few runs, note how your board responds, and your muscles feel.
Choosing Your Stance Angle
Apart from width, the angle of your feet plays a significant role in your stance. This is where the term ‘duck stance’ or ‘alpine stance’ comes into play.
Understanding the concept of stance angle
The angle at which your feet point on the snowboard is your ‘stance angle.’ It’s noteworthy as it affects how you distribute your weight, which impacts your balance and control.
Deciding on appropriate forward and rear angles
The forward and rear angles should complement your riding style. If you’re into freestyle or all-mountain riding, you might prefer a ‘duck stance’ where both feet point outward. Whereas if you’re an alpine or freeride snowboarder, both feet pointing forward might yield better results.
Effects of stance angle on riding
The right angle will allow a smoother transfer of weight when making turns, and will make your ride feel more natural and effortless. An incorrect angle, however, can make riding uncomfortable and affect your performance.
Adjusting the Binding Position
Once you’ve figured out your stance and angle, it’s time to adjust your bindings. The position of these clasp-like contraptions is crucial as they hold you to your board.
Determining the right binding position
An ideal binding position aligns your body comfortably over your board. Centered bindings are great for more balanced rides, while set-back bindings enable better control in deep powder.
How binding position relates to balance and control
Your center of gravity changes with the binding position. A forward binding setup offers more responsive turns, while a centered setup will benefit balanced manoeuvres like spins and jumps.
Steps for adjusting binding position
Adjust the setup based on your findings when experimenting with stance width and angle. Your snowboard will surely have multiple holes to screw your bindings into. Loose them, adjust your position, and then tighten them back up.
Exploring Different Snowboard Stances
Description of duck stance
From the name itself, a ‘duck stance’ is when your feet point slightly outward, like a duck’s. This stance is popular among freestylers and all-mountain riders as it allows easier switch riding.
Benefits of alpine stance
On the other hand, alpine stance, with both feet pointing towards the nose, works great for carving and high-speed rides. It aligns the body for better forward motion and helps maintain an aggressive edge hold.
When to use freeride stance
Freeride stance, which is a slight variation of the alpine, with the rear foot pointing less forward, is ideal for deep powder terrain. Because of the hitch at the tail, it helps keep the nose floating above the snow.
Practicing Your Stance Off the Slopes
Having discovered the ideal stance, practice it. Like how soccer players don’t only play matches, but they spend hours refining their skills, you too have to practice your stance.
Ideas for practicing at home
Get on your board at home, imagine yourself on the slopes and gently transfer your weight from one foot to the other. You can also mimic your favourite snowboard moves. Observe how you balance yourself and how the imaginary board reacts to your movements.
Becoming comfortable with your stance
As you practice your stance off-slopes, your body will start to memorize it. Essentially, the goal is to achieve a stance that feels so natural that you don’t have to think about it while riding.
Maintaining flexibility in stance
Remember, fluidity is key in snowboarding. While it’s good to have a stance that you’re comfortable with, stay open to minor adjustments based on terrain and riding conditions.
Proper Equipment Maintenance
Your stance isn’t the only thing needing your attention. The gear that makes it all possible requires regular TLC to keep them working in sync with you.
Periodically checking your binding screws
Make sure to check your binding screws regularly. Vibrations during riding can cause them to loosen, hampering your control over the board and possibly leading to accidents.
Assessing your snowboard for damage
Examine your snowboard for any damage before and after your rides. Any cracks or impactful scratches can affect your board’s performance and your riding experience.
Routine gear cleaning and upkeep
Pow residue, dirt, and moisture can damage your gear over time, affecting not just its look but, more importantly, its functionality. Cleaning them routinely and storing them in a dry, cool area can extend their lifespan.
Advanced Stance Adjustments
Like any skill, there’s always room for improvement and up-gradation. Go beyond the basics and delve into advanced stance adjustments for superior performance.
Fine-tuning stance for performance
Fine-tuning your stance to match your speed, agility, and strength can contribute to an improved snowboarding performance. Remember, even minor tweaks can make a significant difference.
Stance tricks used by professionals
Professional snowboarders often have their stance tricks to maximize their performance. Some might prefer a wider angle, while others could go for an unconventional binding placement. Watch and learn from them but remember to always use your comfort as the ultimate guide.
Adjustments for various terrain types
Different terrains demand different stances. For instance, you might need a wider, more aggressive stance for intense back country or a relaxed, centered stance for a cruisy groomer day. Being able to adjust your stance per terrain and even per run will make you a versatile rider.
Tips for Beginners
Setting up your snowboard stance for the first time can be intimidating. But keep in mind, everyone has been here, and we all learn from our mistakes.
Things to avoid when setting stance
Don’t rush into finalizing a stance. It’s a process of experimentation and adaptation. Avoid starting with extreme angles or excessively wide or narrow stances. Be adjustable and patient. Also, never ignore discomfort. Your stance should make you feel balanced, controlled, and comfortable.
Incorporating stance setting into your pre-ride routine
Role your stance setting into your pre-ride routine. Checking your bindings’ position and screws’ tightness should become as routine as fastening your boots.
Considerations for first-time riders
For first-timers, softer, flatter, and wider boards tend to be easier to handle. Also, a medium stance width with minimal angle works well initially. As you gain confidence and skill, then you can start to play with narrower or wider widths, bigger angles, and the likes.
Remember, there isn’t a ‘perfect’ stance. There’s only the perfect stance for you. So, use these guidelines as a starting point, experiment relentlessly, observe your comfort and the board’s response until you discover your unique perfect stance. Happy shredding!
- What Snowboard Bindings Should I Get? - January 23, 2024
- What Size Screws For Snowboard Bindings? - January 23, 2024
- How To Snowmobile On Water? - January 23, 2024

