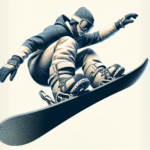
As you’re stepping into the thrilling world of snowboarding, you’ll soon realize that setting up your own board properly is one of the most essential skills you’ll need to master. The article “How To Set Your Snowboard Bindings?” takes you through a step-by-step process, breaking down the often overwhelming task of fitting your bindings optimally. It’s not just about strapping on your boots and hitting the slopes, but it’s about understanding your gear, getting the correct angles in place, and ensuring everything is secure for a safe and satisfying ride. Within this article, you’ll find the expert guidance you need to set your bindings like a professional, leading you towards smoother turns and better control on your snowboard.
Understanding Snowboard Bindings
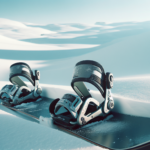
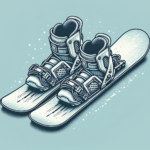
Snowboard bindings are vital components in your snowboarding gear. They provide the link between you and your snowboard, allowing you to control the board’s movement and direction. Without them, snowboarding would be impossible. Therefore, it’s essential that you understand the different types and their basic components.
Different Types of Snowboard Bindings
There are three main types of snowboard bindings: strap-in, rear-entry, and step-in bindings. Strap-in bindings are the most common and offer excellent control. They have two straps (one on your toes and one across your ankle) that secure your boot in the binding. Rear-entry bindings have a hinged highback that drops down, allowing you to quickly slide your boot in and out. Lastly, step-in bindings are similar to ski bindings; you just step down and click into place.
Basic Components of Snowboard Bindings
Snowboard bindings typically consist of the baseplate, straps, highbacks, and buckles. The baseplate attaches the binding to the snowboard and distributes your weight across the board’s surface. The straps secure your boots in the bindings. Highbacks are plates located on the bindings’ backside, providing support for your ankles and calves when you lean back. The buckles are used to tighten or loosen the straps.
Determining Your Riding Style
Your snowboarding style will influence the type of bindings you choose and how you set them up. Two main factors come into play here: your dominant foot and the type of snowboarding you do.
Regular or Goofy Foot
Snowboarders ride with one foot forward. If your left foot is forward, you’re “regular”; if your right foot is forward, you’re “goofy”. This isn’t connected to whether you are right or left handed, instead, it is about which foot you naturally put forward.
Type of Snowboarding
The kind of snowboarding you prefer will also influence your binding setup. Freestyle riders, who spend most of their time in terrain parks performing tricks, generally prefer a duck stance where both feet are angled away from each other. Free riders, who love carving down the mountain and off-piste, might prefer a forward stance where both feet point towards the front of the board.
Deciding on Binding Angles
Once you have identified your foot dominance and riding style, it’s time to set your bindings’ angles.
Understanding Angles for Snowboard Bindings
The angle of your bindings determines how your boots sit on the board. This is measured in degrees and usually ranges between negative 30 degrees and positive 30 degrees. A 0-degree angle means your foot is perpendicular to the length of the snowboard.
Determining Proper Angles for Your Style
The ideal angle depends on your riding style. Freestylers often use a duck stance with angles like +15/-15 degrees since it facilitates tricks that involve riding switch. Free riders may choose a forward angle like +21/+6 to assist with carving. The angles are not set in stone, and you should try different settings to see what feels most comfortable to you.
Determining Stance Width
Stance width is another significant factor in setting up your bindings.
The Importance of Proper Stance Width
The stance width refers to the distance between the center of your left and right foot binding. It significantly affects your balance, flexibility, and overall performance. A wider stance offers more stability but less flexibility, while a narrow stance offers more flexibility but less stability.
How to Measure Your Stance Width
A solid starting point is to set your stance width roughly equal to your shoulder width. Ultimately, the width should allow you to flex your knees easily and feel comfortable when in a squatting position. It’s best to experiment until you find the optimal width for your style and body structure.
Setting Up Your Bindings
Before you can ride, you must attach your bindings to the snowboard.
Locating the Binding Mounting Holes
Snowboards come with pre-drilled holes where you can mount the bindings. The array of holes allows for several mounting options, giving you the flexibility to set your preferred stance width and binding angles.
Attaching the Bindings to the Snowboard
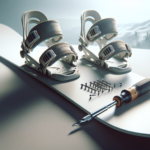
To attach the bindings, place the baseplate on the board such that the holes align with those on the board. Then, insert screws through the baseplate holes into the board’s holes and tighten them. Make sure not to over-tighten, as this can damage the board or bindings.
Adjusting Highbacks
The highbacks on your bindings play a vital role in your ability to control your snowboard, and their adjustments can affect your riding style.
Understanding the Role of Highbacks in Snowboarding
Highbacks are the vertical plates on the rear side of your bindings. They support your calves and ankles when you lean back on your heels. By pushing against them, you can turn and control your board, making them an essential part of your setup.
Steps to Adjust Your Highbacks
Adjusting your highbacks involves setting their height and angle to match your riding preferences. A higher and more inclined highback provides more responsiveness and is excellent for aggressive riders, while a lower and less inclined highback offers more flexibility and is suitable for freestyle riders.
Fine-Tuning Your Bindings
Fine-tuning your bindings ensures that they perfectly match your needs and offer a comfortable and fun ride.
Adjusting the Straps for Comfort and Control
Adjust your straps so that your boots are snug but not too tight in your bindings. Over-tightening the straps can limit your blood circulation and result in cold feet. Conversely, loose straps can give you less control over your board.
Testing and Modifying Binding Settings
After setting everything up, take your board for a spin! If something doesn’t feel right, don’t hesitate to adjust your settings. Finding the perfect setup might take some time and experimentation, but it’s worth it!
Maintaining Your Snowboard Bindings
Like any other piece of equipment, your snowboard bindings require regular maintenance and checks for optimal performance and to prolong their lifespan.
Regular Maintenance Procedures
This includes routinely checking your bindings for cracks, loose screws, and worn-out straps. It’s also crucial to wipe down your bindings after each use to prevent rusting and to store them in a cool, dry place.
Spotting and Solving Common Issues
Common issues can occur in the form of binding failures, such as broken straps, baseplates, or buckles, and often result from regular wear and tear. If you encounter these issues, it’s best to repair or replace the affected part as soon as possible.
Safety Precautions when Setting Your Bindings
Proper binding setup is essential, not only for optimal performance but also for your safety.
Preventing Injuries by Correct Binding Set Up
Incorrect binding setup can result in discomfort and even injuries. For instance, if your bindings are set too widely, you risk knee damage. Similarly, the wrong angles can strain your ankles or decrease your control over the snowboard, making falls more likely.
Importance of Regular Safety Checks
Regularly inspect your bindings to ensure all components are in good condition and correctly set up. Additionally, always ensure your straps and buckles are securely fastened before you start snowboarding to prevent unexpected slips or falls.
Common Mistakes in Setting Snowboard Bindings
Even experienced snowboarders sometimes make mistakes when setting their bindings. Recognizing and learning how to fix these can dramatically improve your setup.
Avoidable Errors in Setting Up Bindings
Some common errors include setting the binding angles or stance width incorrectly, not tightening the straps enough, setting the highbacks wrongly, and neglecting regular maintenance. Moreover, many snowboarders don’t try out different setups, sticking with the first one that feels comfortable, potentially missing out on a more optimal setup.
How to Correctly Fix Binding-Setting Mistakes
The most effective way to fix these errors involves understanding the basics of binding setups, stating with your riding style, and adjusting everything according to your preference. It’s also critical to take your time when setting your bindings, and frequently check and adjust them as necessary.
In conclusion, setting up your snowboard bindings isn’t as complicated as it might seem. With the correct knowledge and some patience, you can set your bindings to perfectly match your riding style, ensuring a fantastic snowboarding experience.
- What Snowboard Bindings Should I Get? - January 23, 2024
- What Size Screws For Snowboard Bindings? - January 23, 2024
- How To Snowmobile On Water? - January 23, 2024

