Are you passionate about snowboarding but feel your snowboard isn’t performing optimally? If yes, then this is the perfect read for you! “How To Sharpen And Wax A Snowboard?” provides an answer to your performance woes. In this article, you’ll learn the best techniques to sharpen your snowboard’s edges for optimal grip and how to apply wax to increase glide efficiency. Get ready to discover the secrets of maintaining your snowboard in peak condition and amp up your thrilling, snowy adventures.
Understanding the Importance of Sharpening and Waxing
As someone who loves snowboarding, it’s crucial to understand that your board needs proper maintenance. That maintenance typically includes sharpening and waxing. The act of sharpening and waxing your snowboard isn’t just about keeping it looking great; it’s more about improving your performance and safety on the slopes.
Importance of maintaining your snowboard
Your snowboard is your lifeline on the snowy mountain slopes. A well-maintained snowboard not only performs better but also lasts longer. Regular maintenance includes sharpening the edges, waxing the base, and attending to any minor repairs before they grow into bigger problems.
Benefits of sharpening the edges
Sharp edges on your snowboard help carve turns and maintain control on icy and hard-packed snow conditions. Dull edges can make your snowboard feel slippery and less effective at turning, especially on hard snow. Also, sharp edges are crucial for your safety; good edge grip can prevent unnecessary falls, injuries, and offers more control over your speed.
Role of wax in maintaining performance
Waxing your snowboard plays a critical role in your snowboarding performance. The wax reduces friction between your snowboard and the snow, enabling smoother and faster rides. It also protects your snowboard from damage caused by various elements (including salt, abrasion, dirt, and chemical pollutants) that are commonly found on the snowy slopes.
Knowing the Materials for Sharpening and Waxing
Before you can start the process of sharpening and waxing your snowboard, you need to gather the right materials.
Required materials for sharpening
For sharpening the edges of your snowboard, you will need a good quality edge tuner or file guide, a metal file, a gummy stone or a diamond stone, and a brass brush.
Required materials for waxing
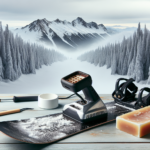
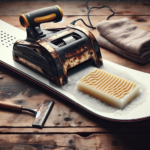
In terms of waxing, you’ll need a suitable snowboard wax (typically available in various forms like hot wax, rub-on wax, and liquid wax), a wax iron, a plastic scraper, a brush, and a piece of cloth.
Where to buy these materials
Just about all of these materials can be easily obtained from any snowboard shop or from online sports gear stores. Make sure you opt for high-quality materials as they’re more durable and effective.
Safety Measures Before Proceeding
Safety should always come first when you’re about to start sharpening and waxing your snowboard. You’re dealing with sharp objects and potentially hot materials, so ensure you’re well-prepared.
Ensuring workplace safety
Choose a well-ventilated and well-lit place with enough space for you to work comfortably. Keep your working area clean and free from any unnecessary objects for preventing accidents or distractions.
Handling the sharp edges
The edges of your snowboard can be very sharp, so be careful when you’re handling them. Wear gloves to avoid cuts and make sure your hands are dry to prevent slipping.
Always be careful when handling the hot wax iron. Never leave it unattended when it’s on and try to avoid skin contact with the hot wax. It’s also important to wax in a well-ventilated area to prevent inhaling any harmful fumes.
Preparing Your Snowboard for Sharpening
Preparation is key before you start the sharpening process.
Cleaning the snowboard
Start by cleaning your snowboard. Use a snowboard cleaner or a mild detergent mixed with water and a cloth to remove the dirt and grime from your board.
Identifying the areas that need sharpening
After cleaning your snowboard, it’s time to identify the areas that need to be sharpened. Usually, the tips, the tail, and the side edges of your snowboard are the areas that wear out most and need regular sharpening.
Securing the board for the process
Before you start sharpening your snowboard, ensure that it’s secured in a position that’s comfortable for you to work on. You can use a snowboard vise or any sturdy object to hold the snowboard in place.
Procedure of Sharpening the Edges of a Snowboard
Sharpening the edges of your snowboard may not be rocket science, but it still requires some care and skill. A sharpened edge will provide better control and precision on the slopes.
Tools required for sharpening
You’ll need a file guide or an edge tuner, a file, a gummy stone or diamond stone, and a brass brush.
Steps involved in sharpening
Start by running your file in one direction down the edge using the file guide. This removes the uneven bumps. Use the gummy or diamond stone to polish the edge and remove any rust or burrs. Finally, use the brush along the edge to clean and remove any residue.
How to know when it’s sharp enough
Testing the sharpness of your snowboard’s edge can be tricky. A common method is by gently running a fingernail along the edge. If it’s sharp enough, it should take off a tiny sliver of your nail.
Checking the Snowboard After Sharpening
After the sharpening process is over, you should check your snowboard thoroughly.
Methods to check sharpness
As mentioned earlier, one of the ways to test the sharpness is by running your fingernail along the freshly sharpened edge. Alternatively, you can also try to gently slide a piece of paper against the edge; a sharp edge will cut the paper crisply.
Importance of checking
Checking the sharpness of your snowboard’s edges ensures that your sharpening procedure was effective. It eliminates the worry of weak grip on the slopes.
What to do if it’s not sharp enough
If your snowboard’s edges are still not sharp enough despite your efforts, repeat the sharpening process. But remember, always keep your movements controlled and steady to prevent damaging the edges.
Preparing Your Snowboard for Waxing
Preparing your snowboard for the waxing process is as important as the actual procedure.
Cleaning the board pre-waxing
Before you wax your snowboard, make sure it’s completely clean. Any dirt or debris remaining on the surface of the board can interfere with the waxing process, resulting in uneven spread.
Choosing the right wax
The type of snow, the outside temperature and your performance expectations all play a role in choosing the right wax. Generally, hydrocarbon-based waxes are good for most conditions, but fluorocarbon wax is ideal for warmer temperatures or wet snow.
Heating the board and wax before application
Before applying the wax, you need to heat the base of your snowboard with a wax iron. Similarly, warm the wax stick by holding it against the hot iron. Remember not to overheat your iron as it may damage your snowboard.
Procedure for Waxing the Snowboard
Waxing your snowboard improves your glide and protects the board from damage.
Tools required for waxing
You’ll need wax, an iron, a plastic scraper and a brush.
Steps involved in waxing
Begin by drizzling the melted wax evenly over the board’s base. Next, use your wax iron to spread the wax evenly all over the base, making sure it gets into all the pores. Remember to keep the iron moving to avoid overheating any part of the board.
How to ensure the wax is evenly spread
Once you finish spreading the wax, examine the base of your snowboard for any missed spots or uneven traits. You’ll know the wax is evenly spread when the entire base of your snowboard has a sheen to it.
Scraping and Buffing After Waxing
Once your waxed snowboard has cooled down, it’s time for scraping and buffing.
Why scraping and buffing is necessary
Scraping removes the excess wax from the base of your snowboard which might slow you down. Buffing (with a brush) then, enhances the structure of the wax, allowing for better glide.
Tools for scraping and buffing
You’ll need a plastic scraper and a nylon brush or a Scotch-Brite pad for this stage.
Steps in scraping and buffing process
Start by running your scraper along the board from tip to tail, taking off the excess wax. After that, use your brush to buff the base of your board, which will improve your glide on the snow.
Post-Waxing Check and Snowboard Maintenance
After the waxing process, you need to examine your snowboard and ensure that it’s ready for the snow.
Methods to check wax quality
Checking your wax quality can be done by visual inspection and a simple glide test. The board should appear glossy and the glide should feel smooth with no drag.
Importance of regular maintenance
Regular maintenance of your snowboard ensures its optimal performance and longevity. By routinely taking care of your board, you maintain its condition and your safety.
Tips for long-lasting maintenance
For your snowboard’s long-lasting maintenance, always clean it after use, ensure regular sharpening and waxing, and store it properly in a dry, cool place. Also, checking your snowboard before and after use can help spot any damage early. Happy snowboarding!
- What Snowboard Bindings Should I Get? - January 23, 2024
- What Size Screws For Snowboard Bindings? - January 23, 2024
- How To Snowmobile On Water? - January 23, 2024
