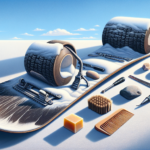
Get ready to hit the slopes! This article is all about teaching you the steps and techniques necessary to properly wax your snowboard. Proper care not only increases the longevity of your snowboard but also ensures that your rides down the hill are smooth, safe, and enjoyable. From picking the right wax, to applying it correctly, all the way through to understanding when it’s time for a new coat and how to scrape off the old, every detail you’ll need is right here to guide you. So, grab your gear (and your board) because your snowboarding experience is about to become even more phenomenal.
Understanding the Importance of Waxing Your Snowboard
Just like a car needs regular maintenance to run efficiently, it’s crucial to keep your snowboard in top shape to improve your performance on the slopes. This definitely includes regular waxing. Not convinced yet? Let’s dive into why it is so important.
Why waxing your snowboard is essential
Waxing your snowboard isn’t merely a suggestion. It’s a fundamental aspect of taking care of your gear. The primary purpose of waxing is to make the base of the snowboard glide more smoothly over the snow. This reduces friction, making your rides faster and smoother. Additionally, waxing protects the base of your snowboard from the elements, including the damage caused by rough icy patches and sharp particles in the snow.
How often should you wax your snowboard
There isn’t a hard and fast rule about how often you should wax your snowboard, as it depends on various factors such as the snow conditions, the frequency of your rides and so on. However, as a general guideline, waxing every 3-5 days of riding is a good idea for regular users. Frequent boarders may even opt for a wax after each intense day on the slopes to ensure peak performance and longevity of their board.
Benefits of waxing a snowboard
Besides a smoother and faster ride, regular waxing also extends the lifespan of your snowboard by preventing base damage. It makes turning and maneuvering easier, provides better control, and helps you conserve energy as you don’t have to push as hard. Not to mention how it enhances your overall snowboarding experience!
Knowing the Right Tools and Materials
While waxing your snowboard, it’s indispensable to have the right tools and materials at your disposal. Let’s get into more specifics.
What kind of wax should you use
There is a multitude of snowboard waxes available on the market. In general, they can be categorized as all-temp wax, temperature-specific wax, and fluorocarbon wax. All-temp wax works reasonably well in most weather conditions and is ideal for beginners. Temperature-specific wax, on the other hand, provides optimal performance if matched with the correct snow temperature. Lastly, the fluorocarbon wax, designed for racing, provides maximum glide.
Tools required for waxing a snowboard
The basic tools that you’ll need to wax your snowboard include a wax iron, scraper, brush (or buffing pad), and of course, the wax itself. It’s also handy to have a workstation or stand where you can secure your board during the waxing process.
Where to purchase wax and tools
Most ski and snowboard shops, as well as many online retailers, sell a wide range of waxing tools and materials. Ensure you’re purchasing quality products from reputable brands to get the best results.
Preparing the Snowboard for Waxing
Just like you wouldn’t paint a dirty wall, you would not want to apply wax on a grimy snowboard. Preparing your board sets the stage for a successful waxing process.
Cleaning the snowboard before waxing
Before you start waxing, you should first clean your board to remove any dust, dirt, or old wax. You can use a mild cleaning solution designed for snowboards or make your own by mixing water with a mild detergent. Rinse off the cleaning solution and thoroughly dry your board before going to the next step.
Inspecting and repairing damages
Before waxing, inspect your board for any damages such as scratches, dings, or gouges. Minor damages can often be fixed at home using P-Tex, while deeper gouges may require professional attention.
Removing old wax
You also need to remove old wax from your snowboard’s base before applying new wax. This can be done with the help of a wax scraper. Remember, the goal here is to start with a clean and smooth base for the new wax.
Setting Up Your Workspace
The space where you’re going to wax your snowboard is just as important as the waxing process itself. You need an area that’s clean, well-ventilated, and provides enough space to work comfortably.
Choosing a suitable location for waxing
You want to pick a well-lit location that’s free from any obstructions. A garage, a workshop, or even an outdoor space can work excellently. Just make sure the environment is clean and that you have easy access to a power source for your wax iron.
Securing the snowboard
To avoid your snowboard slipping and sliding around while you’re waxing, make sure it’s firmly secured on a snowboard stand or a sturdy table. Non-slip mats or towels can also provide additional support.
Organizing your tools
Before you start, ensure all your tools and materials are at an arm’s length. A clean, organized workspace not only speeds up your waxing process but also helps eliminate potential hazards.
Applying the Wax
Now that you’re all set up, it’s time to start waxing your snowboard.
Heating up the wax
Heat the wax iron to its recommended temperature, hold it a few inches above the base of the board, and then gently press the wax against it. As the wax starts to melt and drip onto the board, spread the drips evenly across the surface.
Applying wax on the snowboard
Now, set the iron on the board and slowly move it around to spread the wax. Start at one end of the board and slowly move to the other, making sure not to leave the iron in one spot for too long to avoid damaging the board.
Ensuring an even distribution of wax
The goal here is to achieve an even layer of wax across the board. Make sure all corners and edges are covered, and if you see any uneven spots, go over them a couple of times with the iron. Remember, you’re not trying to build up a thick layer of wax but rather to have a thin coat evenly distributed.
Letting the Wax Cool
Once the wax has been applied evenly across your snowboard, it’s time to let it cool and harden.
Suggested amount of time for cooling
A good rule of thumb is to let the wax cool for at least 20-30 minutes, though some boarding enthusiasts recommend leaving it for a few hours or even overnight for best results.
Determining if the wax is fully cooled
Touch the wax gently to check if it has hardened. If it feels dry to the touch, the wax has fully cooled.
Why allowing proper cooling is crucial
Proper cooling ensures that the wax has time to absorb into the base and harden properly. Scraping off the wax too soon may result in an uneven finish.
Scraping Off the Excess Wax
After the wax has fully cooled and hardened, it’s time to scrape off the excess to reveal a smooth, shiny surface.
Where to start when scraping
Start from one end of the snowboard and work your way to the other. The idea here is to avoid jumping around and scraping at random.
Techniques for effective scraping
Hold your scraper at a 45-degree angle, apply consistent pressure, and use long, steady strokes. Remember, it’s better to scrape off too little wax than too much.
Ensuring all excess wax is removed
After you’re done scraping, run your hand over the base of the snowboard to ensure all extra wax has been removed. You’re aiming for an even and smooth feel across the board.
Buffing the Snowboard
The final step in the waxing process is to buff your snowboard. This gives it a nice, smooth finish, making you ready to hit the slopes.
Why buffing is important
Buffing helps create a silky, smooth finish which improves glide. It’s the final touch that ensures your board is in the best condition possible for your next adventure.
Proper method of buffing
Using a dedicated snowboard buffer or a nylon brush, buff your snowboard in the same direction as your scraping – from tip to tail. Use long, smooth strokes to get an even finish.
Checking for a smooth finish
After buffing, run your hand over your board one last time. It should feel smooth and slick, with no noticeable bumps or dry patches. If there are, you may need to reapply wax and repeat the process.
Post-Waxing Maintenance Tips
Now that your board is waxed and ready, here are few maintenance tips to keep it in peak condition.
Protecting the snowboard after waxing
Avoid getting your freshly waxed snowboard dirty or wet to maintain the coating. Also, be careful not to cause any scratches or dents in the wax.
Proper storage of waxed snowboard
Store your board in a cool, dry place away from direct sunlight. The protective wax coating can get damaged by extreme heat or sunlight.
Signs that your snowboard needs waxing again
Keep an eye out for dry patches or areas where the base seems to be gray or white. This means the wax has worn off and your board needs a fresh coat.
Common Mistakes to Avoid When Waxing a Snowboard
Even experienced snowboarders sometimes make mistakes while waxing their boards. Here are some commonly made errors to avoid.
Applying too much or too little wax
Applying too much wax can create a sticky, slow board and make scraping more difficult. Yet, applying too little wax means your board isn’t getting the protection and glide it needs. Remember, an even, moderate layer is key.
Not allowing wax enough time to cool
Patience is critical when you’re waiting for your board’s wax to cool. Not allowing the wax to fully cool and harden will obstruct the scraping and buffing process.
Skipping the scraping and buffing process
Don’t cut corners by skipping the scraping and buffing stages. These steps are necessary to achieve that smooth, fast-riding base you’re aiming for.
And there you go! Waxing your snowboard can seem intimidating at first, but by following these steps, you’ll become a pro in no time. The end result is worth the effort – a well-waxed snowboard means smoother, faster, and more enjoyable rides. So grab your gear, set aside some time, and give your snowboard the loving care it deserves!
- What Snowboard Bindings Should I Get? - January 23, 2024
- What Size Screws For Snowboard Bindings? - January 23, 2024
- How To Snowmobile On Water? - January 23, 2024

